Showing posts with label free crochet. Show all posts

Wednesday, October 1, 2014

Crochet Mood Blanket 2014 - October Square - Free Pattern

Crochet Mood Blanket 2014 - October Square by Pukado


Happy 1st of October! 10 months already, can you believe it?? So I should have 80 squares soon, but I’m a bit behind :( still need to 6 squares from September and 6 squares for October. I will get it done before the month is over!!!
2014-09-29 11.43.37.jpgBut I have been so busy this month, it just didn’t happen. As some of you know, I have an autistic boy at home. That’s why I’m a stay at home mam and how I came to be a crochet addict. In his little autistic world, he can’t go outside without a hat on. In summer he has his caps and his paddy cap. And in winter he has his warm earflap hats. It all started with the angry bird hat I made him 2 years ago. No clue how to crochet, but determined to make my boy happy and give him an angry birds hat. And he was happy. My boy loves his videogames, angry birds, PVZ, Minecraft, Pokemons, Pacman, etc. And to make something for him, gives me so much joy, it’s like a drug to me!


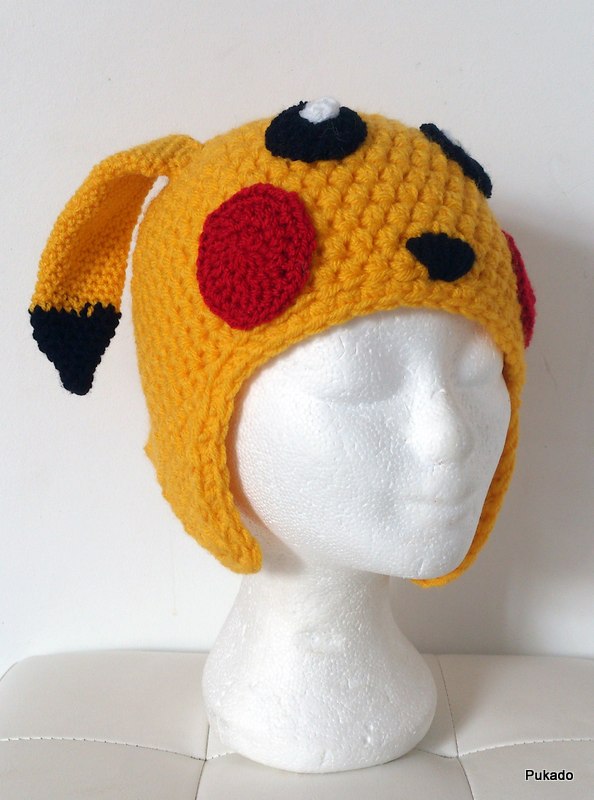
I made him a Pikachu Hat and he loved it so much, he hasn’t taken it off since (except in the bath). He will tell me what kind of hat he wants and I try to make it. He has requested several other pokemon hats since then, but I have other stuff to create as well hahaha

But I was busy this month for him, a hospital visits (to get his tonsils out), lots of appointments, lots of talks and trying to find the best school for him. And to keep my mind occupied at night, I create new designs. Repeat designs are not good for relaxing in my case, I need a challenge. So I made a lot of patterns this month. I’m especially proud of my V-Licious hat and my P2P shawl (pattern is at the tester!)
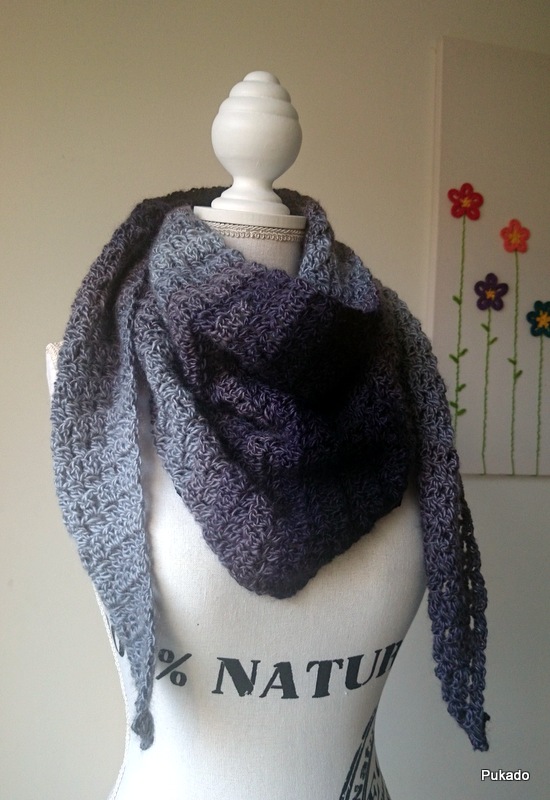
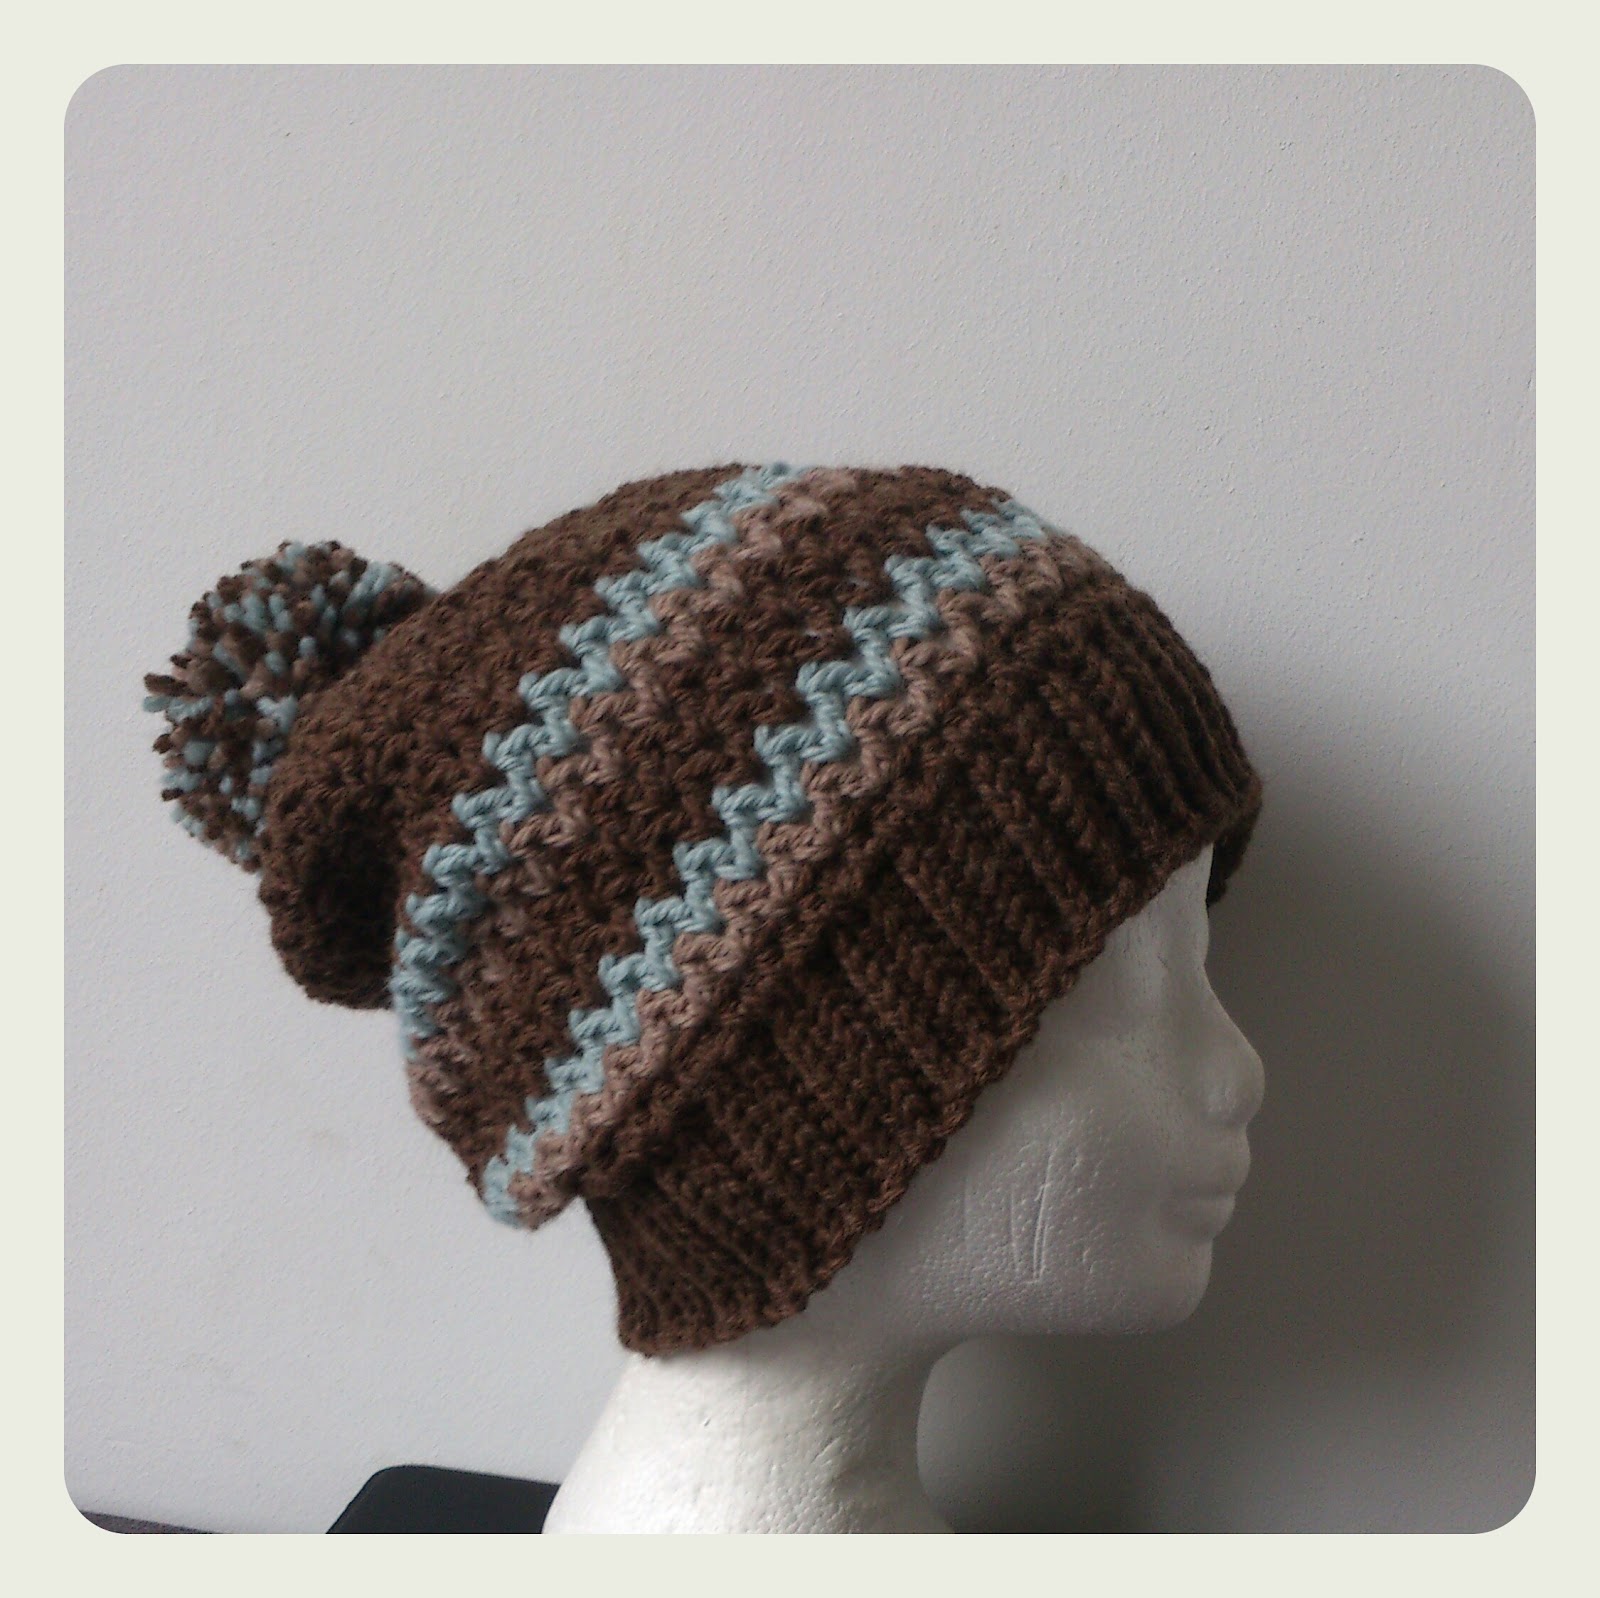
 
P2P                        V-Licious

So that’s why I’m a bit behind, but nothing a couple of evenings can’t solve.

So on to October. Again, I used stylecraft DK and hook size 4.5mm for my mood blanket.

For the multi colored one I used Catania cotton and hook size 3.5mm.


In the photo’s I will not fasten off after every color change, as I’m making my squares in solid color and only use the multi colored one for the pattern to show you how it looks. So excuse the ends :)

R1, MC, 12DC in MC - 12st
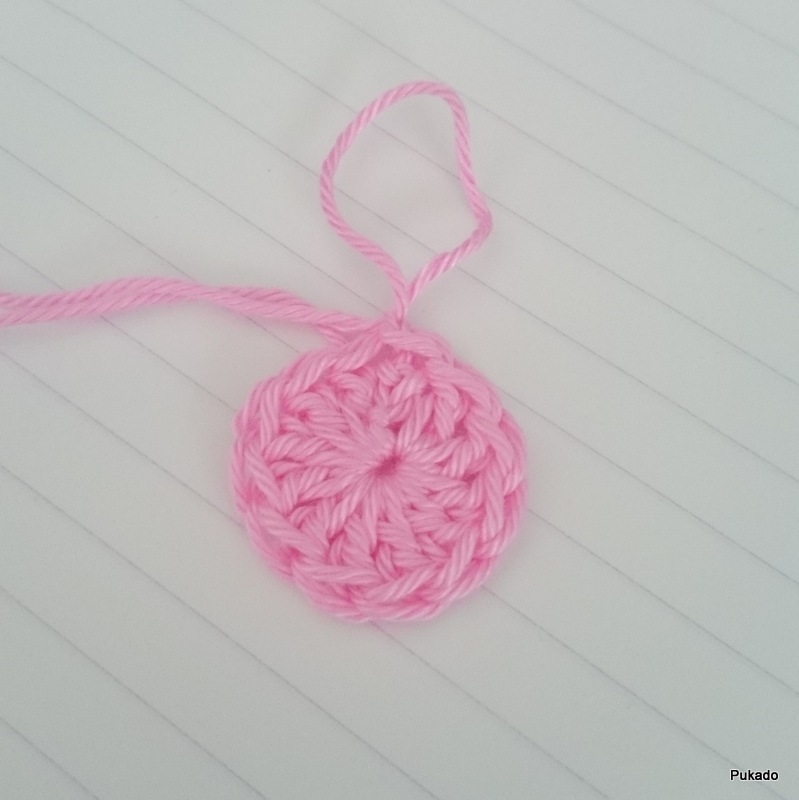


The following row will be split in 2 if you are using more than 1 color.

If you’re using only 1 color, please follow:

R2, *CH3, SC in sec CH from hook, SC in last CH, SLST in same st, SLST in next st, CH3, DC3Cluster, CH3, SLST in same st, SLST in next st* repeat around, SLST to first CH of CH3
SLST twice up to the top of the first CH3 to start R3

If you’re using multiple colors, please follow:

2A, SLST to random st, *CH3, DC3Cluster, CH3, SLST in same st, SC in next st* repeat around, SLST to first SLST

2B, SLST in between flower petals in stitch of R1, *CH3, SC in sec CH from hook, SC in last CH, SLST in same st, CH3 (behind flower petal, fold petal forward for easy access), SLST in next st of R1 in between flower petals* repeat around, SLST to first SLST

Fasten off and start R3 on top of the first CH3 with new color.


R3, *CH3, SLST on top of next petal, CH3, SLST on top of CH3* repeat around, SLST to first CH3, do not fasten off to change color
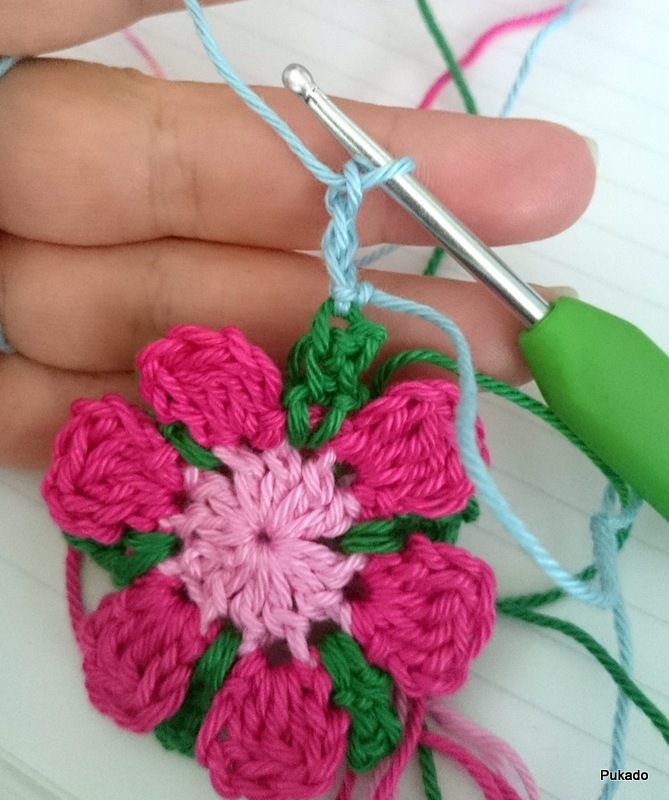
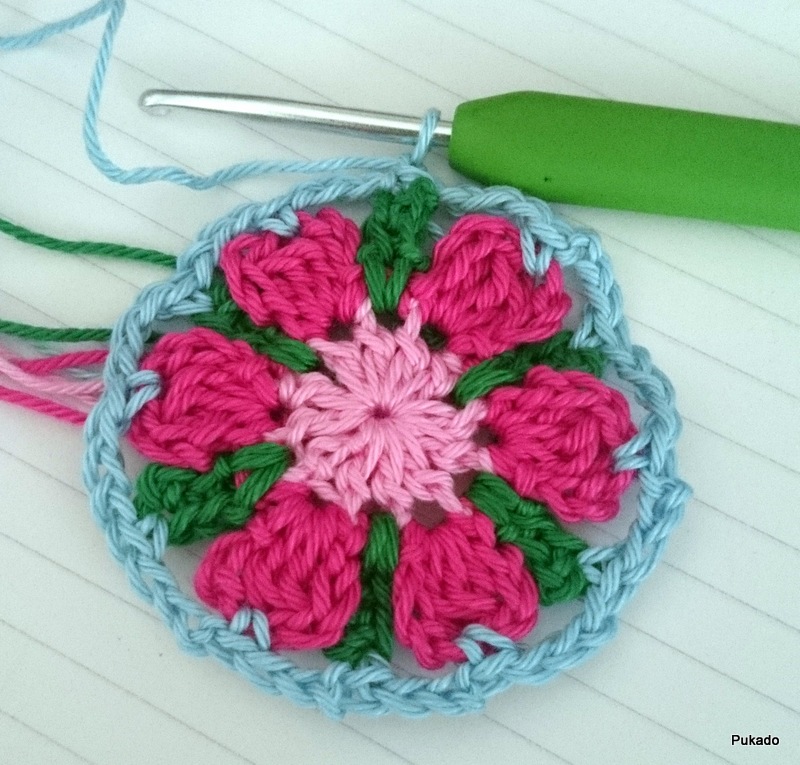
R4, SLST in first CH3Space, CH1, 3SC in same CH3Space, *4SC in next CH3Space* repeat around, SLST to first SLST


R5, CH2, FPHDC in next 2st, BPHDC in next st, CH2, *BPHDC in next st, FPHDC in next 2st, BPHDC in next st, CH2* repeat around


R6, (If working in 1 color: R5 ended just in front of the first CH2Space on the side, so that’s where I pick up again, by starting in the last CH2 you made. If working with a new color: SLST to random CH2Space), 3DC in CH2Space, 6DC in next CH2Space, *(6DC, CH2, 6DC) in neaxt CH2Space, 6DC in next 2 CH2Spaces* repeat around, last series you will add 3DC to first CH2Space to complete the series. Do not fasten off, you will continue R7 in same color.
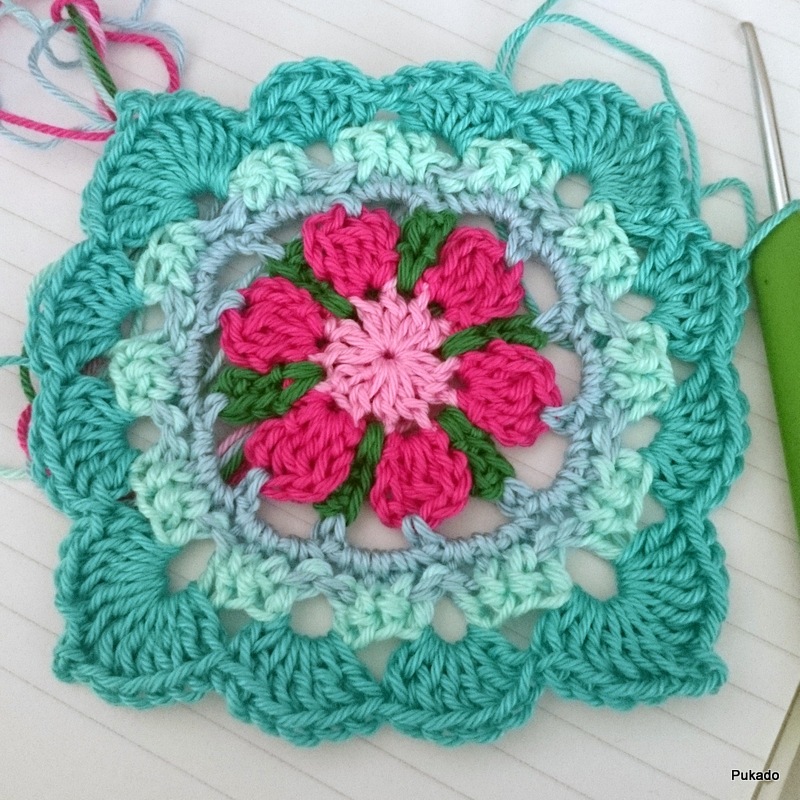

R7, *CH3, SC on top of the next shell, CH3, SC on top of the next shell, CH3, SLST in corner CH2Space, CH3, SLST in same corner space, CH3, SC on top of the next shell, CH3, SC on top of next shell* repeat around


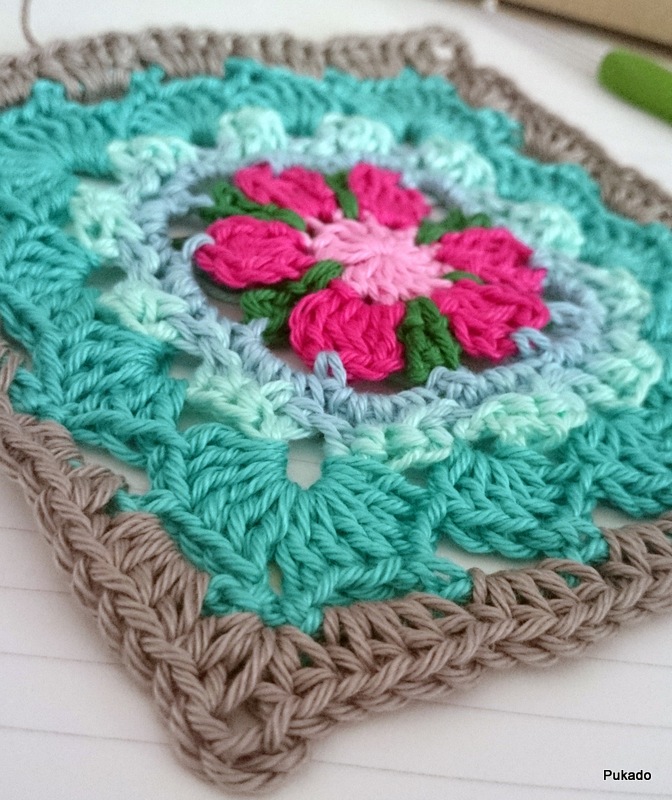
R8, SLST into next CH3Space, CH2, 3HDC in same CH3Space, *4HDC in each of next CH3Spaces until you reach a corner, 2HDC, CH2, 2HDC in corner space* repeat all around, SLST to first HDC.

Fasten off with invisible join, weave in all ends.


Copyright Patricia Stuart 2014 ©.
You are free to create from the pattern and sell the creations.
Please do not copy, rewrite, resell or distribute as your own, this is prohibited.
Please give credit to my blog or Ravelry shop for the pattern and if you sell finished items online,
please provide a link to my blog or ravelry for the pattern.
Thank you for your understanding.


Please visit my blog: Pukado - Blog
Please visit any of my shops at Etsy, Ravelry or Craftsy
FaceBook me! @Pukado
Follow me on Pinterest


Tuesday, September 2, 2014

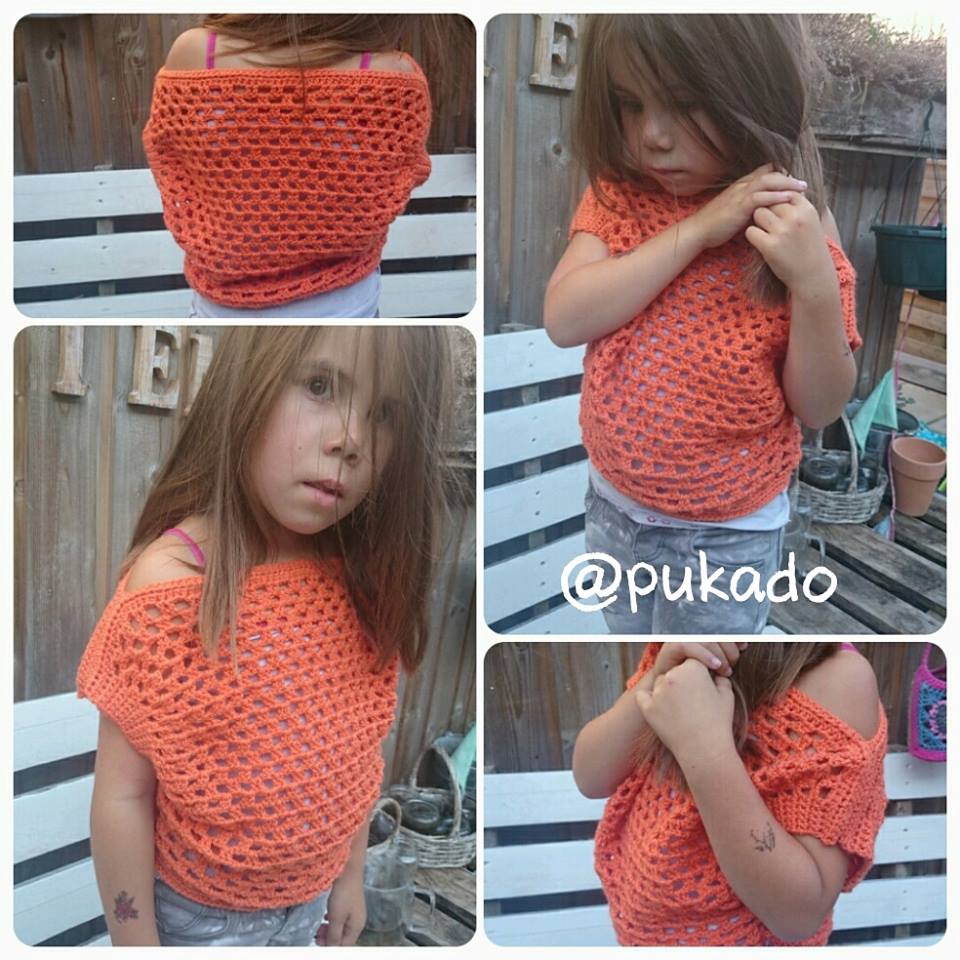
Easy Peasy Top by Pukado - Free Pattern!!

Easy Peasy Top by Pukado


10615535_689319621157294_4564717193049762984_n.jpg


A little easy pattern to make something gorgeous!

download now on Ravelry


Yarn - Stylecraft DK
Hook size - 4mm
Yarn needle to weave in ends


Gauge:
Block is 2DC, CH2
4”x4” = 4.5blocks x 8rows


Beginning chain is an even amount of stitches plus 14
13 = 5, 5, 2, 4
Where 5 is the border for the arm part
2 is the first CH2 in the row of blocks and 2 is your begin chain at the start


I chained until it was the length from elbow to elbow and then added chains to get to an even number and added my 14 extra chains.
For my 6 yr old I chained 68 plus 14 = 82
For my 9 yr old niece I chained 80 plus 14 = 94


Length of the front and back part. For the CH82 I added 22 block rows, for the CH94 I added 25 block rows. Add enough rows that it will cover the front part of your body until your diaphragm (or half way your body).


Make 2, front and back


R1, Chain the amount required, turn, HDC in each chain, CH1 and turn
R2, SC in first 5st, CH2, skip 2st, *DC in next 2st, CH2, skip 2 st* repeat until the last 5st, SC in the last 5st, CH1 and turn
R3, SC in first 5st, 2SC in first CH2Space, CH2, *2DC in next CH2Space, CH2* repeat until the last CH2Space, 2SC in last CH2Space, SC in last 5st
R4, SC in first 5st, CH2, *2DC in next CH2Space, CH2* repeat until the last 5st, 2SC in last CH2Space, SC in last 5st
Repeat R3 and R4 until you have reached the length you require


2014-08-31 08.52.28.jpg


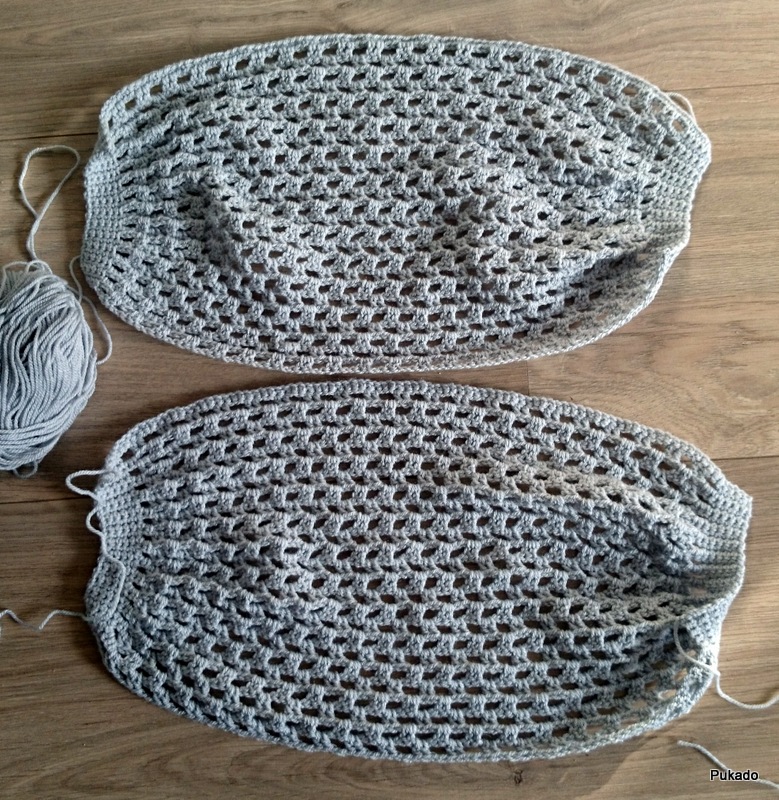
Line up both parts at R1
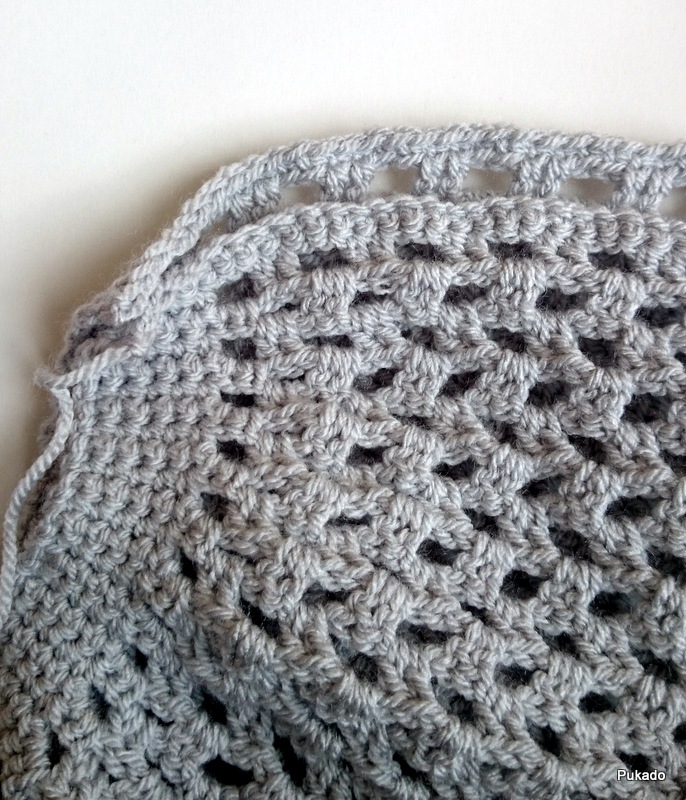
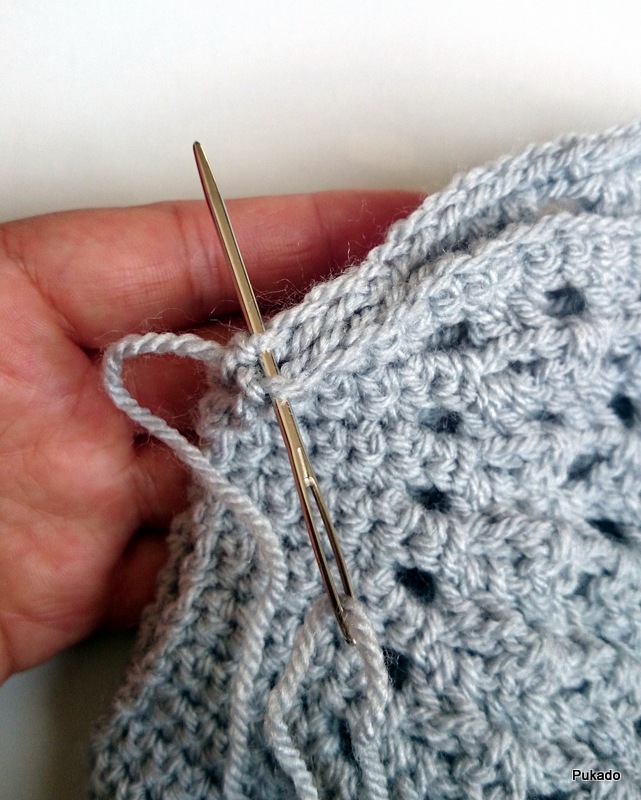
With yarn needle sew on both side the same amount of stitches together. I used the outer loops only, so front loop of front part and back loop of back part.
For the CH82, I stitched 17st together on both sides (68 divided by 4 = 17)
For the CH94, I stitched 20st together on both sides (80 divided by 4 = 20)
But you can add more stitches if you don’t want an open neckline like that.


2014-08-31 08.53.55.jpg


2014-08-31 08.54.52.jpg


2014-08-31 08.57.33.jpg


Turn it around and stitch both SC part together on the bottom with 5 stitches.


2014-08-31 09.07.48.jpg
Weave in ends
Next part you will work in the round and decreasing with 1 block on the sides every row. Decrease until it will fit the waist of the person you’re making it for.


For the CH82, I decreased 4 rows
For the CH94, I decreased 5 rows.


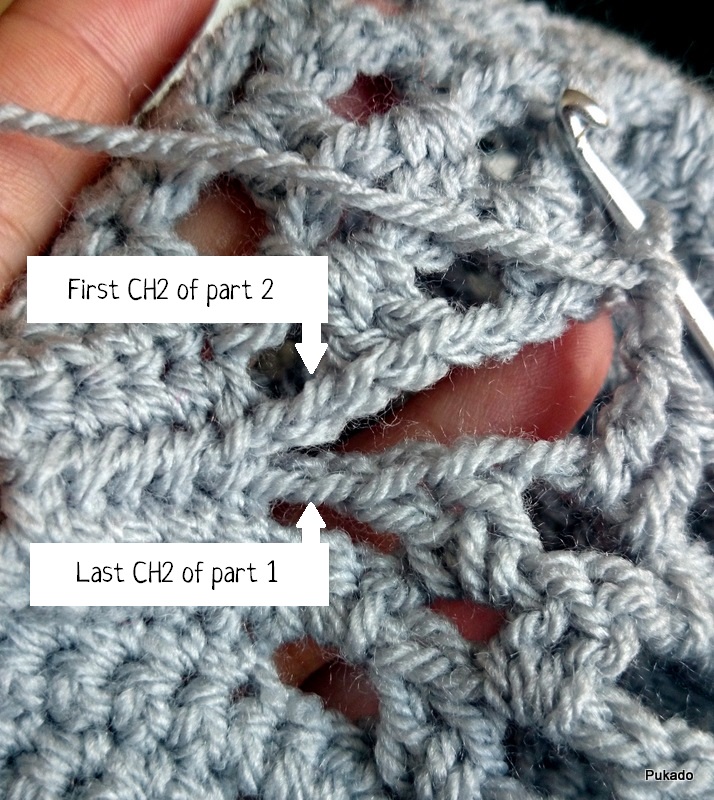
R1, SLST to a CH2Space in the middle of part 1 (only for first row), CH2, DC in same space, CH2, *2DC in next space, CH2* repeat until you reach last CH2Space, 2DC in last CH2Space of Part1 and first CH2Space of Part2, CH2, *2DC in next space, CH2* repeat until you reach last CH2Space, 2DC in last CH2Space of Part2 and first CH2Space of Part1, CH2, *2DC in next space, CH2* repeat until end, SLST to first DC, SLST into next CH2Space
Repeat R1 until it will fit the waist of the person you’re making it for.


2014-08-31 09.13.53.jpg2014-08-31 09.31.37.jpg
2DC around last CH2Space and first CH2Space


R2, CH2, DC in same space, CH2, *2DC in next space, CH2* repeat until end,  SLST to first DC, SLST into next CH2Space
Repeat R2 until you’re happy with the length. I only added 1 extra row as I wanted the top to be cropped. They will wear it with a tank top or t-shirt underneath.


Edging after you reached the desired length
R3, CH1, *2SC in CH2Space, SC in next 2st (on top of DC of previous row)* repeat around, SLST to first SC
R4, CH2, HDC in each st around.


Weave in ends


Other uses for this pattern, using only 1 part


Cowl
Just make 1 part, fold double lengthwise and stitch ends together to close it.


2014-09-02 09.55.58.jpg2014-09-02 09.58.04.jpg


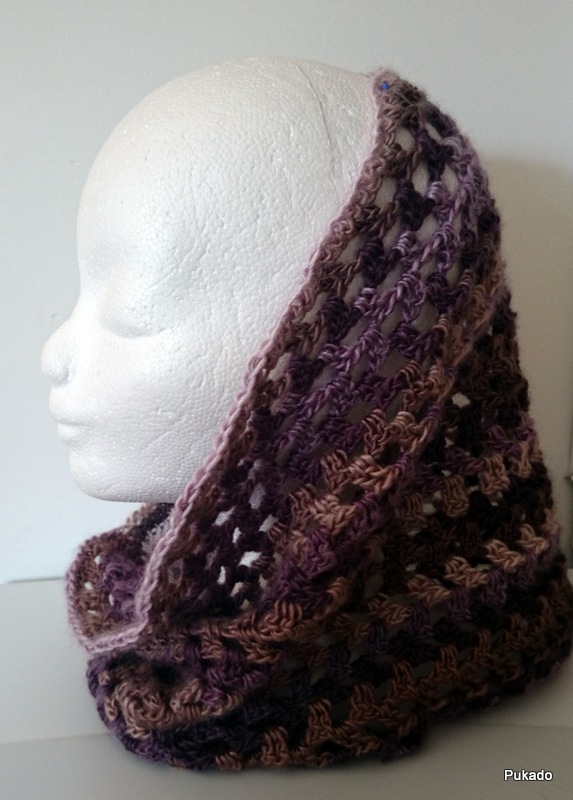
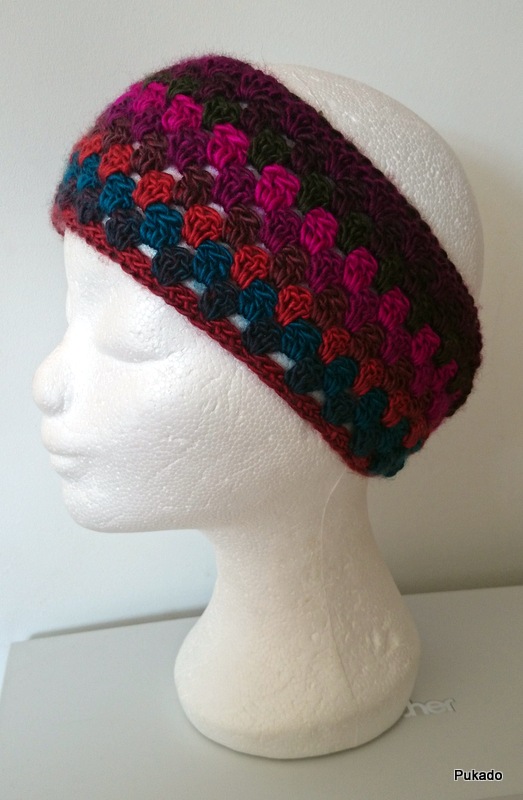
Or make a headband, Chain the amount that will fit around your head, make sure it’s and even number plus 13. Instead of HDC in first row, use SC. And edge bottom with SC, fold double lengthwise and stitch ends together to close it.


2014-09-02 09.53.54.jpg


Copyright Patricia Stuart 2014 ©.
You are free to create from the pattern and sell the creations.
Please do not copy, rewrite, resell or distribute as your own, this is prohibited.
Please give credit to my page for the pattern and if you sell finished items online,
please provide a link to my page for the pattern.
Thank you for your understanding.


Please visit my blog: Pukado - Blog
Please visit any of my shops at Etsy, Ravelry or Craftsy
FaceBook me! @Pukado
Follow me on Pinterest
Thursday, February 13, 2014

Free Pattern - Toy - WaterMelophant Handpuppet - LOVE!

I was watching "Cloudy with a Chance of Meatballs 2" with the kids. And just the idea of food and animals combined was brilliant in my mind! Amazing the foodimals they have come up with, Fla-Mango's, Shrimpansees and so many more! And off course the WaterMelophant! So funny! And I and the kids fell in love with them.

I had a few ideas in my head forming and I started playing with my Phildar and needle... and 2 days later this is the result!


I LOVE IT!!! And so do the kids!!!

I wrote the pattern down while making it. I haven't tested it and hoping by following it, you will have the same result. To make it bigger, you have to adjust the increase rows in the beginning, but once you increase them, you have to increase the mouth circle and the trunk. So write down what you do!

If you have any questions, let me know!

Pattern after the break!

Monday, January 27, 2014

Crochet Your Mood Blanket - Februari Granny - Free Crochet Pattern

I have finished Januari!! And I love it! My colors for are:

Blue - Clever - Because I was playing with my The Most Almost Invisible Hat Seam!
Lavender - Lazy and creative - It was the last week of the holidays, we we're very lazy spending days in our PJ's and I was just happily crocheting and creating.
Green - Joyful - We were just full of joy, because my little boy had a brilliant first week at school.
Pink - Inventive - Working on patterns and patternwriting.
Red - Passionate - In my campaign against the heaps of dogpoo in front of my house!
Yellow - Happy - Again my boy did brilliant and even the mornings getting him out of the house is going supergreat!
Blue - To represent my lovely blue bruises I got after a night of Roller Skating with my friend.
Soft Pink - For having good friends and trying to be a good friend


As mentioned before, I will be doing a different Granny every month. And the granny I will be using for februari is this one:


It is the same size as the Januari Granny, so they will match perfectly!

The pattern for the Mood Granny is below, you can also download a PDF here!

Tuesday, January 7, 2014

Crochet Your Mood Blanket - Week 1! Free Crochet Pattern!

I'm horrible in doing afghans, blankets or other large projects. I just get bored, I can't do it. I have several scarves that still needs finishing! Hats are fine, hats are easy, hats are finished!

BUT, I do love my blankie on the sofa on a cold winter evening with a nice cup of tea, good show on tv and my crocheting. And honestly, I don't have a home made blanket. I have a nice shop bought Sea Green warm and fluffy blankie. And I love my blankie.. My son loves it and we fight over it constantly. Now with the cold days he's taking it with him to bed, horrible monkey!!! Leaving me on the sofa with a fleece blanket, that is just not doing the business!

Then I saw a post about "Crochet Your Mood Blanket" on Crochet me Lovely's Facebook! Basically you crochet 1 granny Square a week that reflects your mood and at the end of the year, you have 52 grannies to make a blanket and it will show you what kind of year you've had! How amazing is that!! So I think I can do a granny a week (but I need your help, so you may stalk, push, scold and harrass me!)

But I need a granny to work with. And I have several grannies, but they just didn't do it for me. Also I wanted one that works well with just one color or with multiple colors. Because my week is rarely just one mood, hahaha!

I tried a bunch of stitches, cross over DC's, drop down DC's and a lot of other amazing stitches. But they have been done already and I wanted something that reflects ME! With some help and great suggestions, I have incorporated my Ziggy Hat Pattern in the centre.

The pattern for the Mood Granny is below, you can also download a PDF here!

And my mood for the first week was LAZY, last week of the holidays, enoying my kids and PJ days! And lavender was the color that was suggested to me on my facebook page, thank you!!

You can find a Color Mood Chart here!

I should have used purple instead of lavender to get the deeply relaxed feeling I had.. But as I said, my mood is never just one mood a week. We had some big things coming up this week, so a bit nervous, questioning, wondering was done by me last week as well. So it was a good pick!

I will try and keep you up to date every week, please also check my facebook Pukado for more updates!

Saturday, December 28, 2013

Free Pattern - Ziggy Hat - love, love, LOVE!!!

Happy Christmas! As promised here is my Christmas pressie to you! My Ziggy Hat as a free pattern! 

I love it, especially how to yarn changes color in the rows. 

Hope to see loads of pictures of finished hats on my blog, facebook or Ravelry!

You can download a copy of the pattern here!

You can find it in my Ravelry and Craftsy shops as well!


I'm a Craftsy Designer


Sunday, October 27, 2013

Free pattern - Puff Stitch Beret Hat and Pretty Arm Warmers

So it's time again for a free pattern.

As my time is still consumed with working on the Starry Starry Night Hat, finishing custom orders and I have a new Rainbow Hat in my head (which is going to be awesome!). I have been thinking about retiring some of my patterns from my shops.

So I chose my Puff Stitch Beret Hat to be a free pattern this time.

It's a lovely hat, easy to make and will keep your head nice and warm!

Included are some nice warm Arm Warmers, for arm measurement 7" to 9".

The bow was made with a free pattern from BobWilson123. They make great video tutorials for youtube to teach crochet. Check them out here!

Saturday, September 14, 2013

Tie a yellow ribbon 'round the ole oak tree

I made this beautiful little tree last spring. I didn't intend to make this tree, I wanted an apple tree! I saw this cute pattern of an apple on the blog of  PlanetJune. I was in love, they were so cute. So I made a bunch of apples, with different kind of yarn. The smallest one, I made with embroidery yarn and it was so cute! So I had this idea of an apple tree in my window full of little red apples.

I was thinking of using real branches. But it just didn't look right, so my branches turned into my Spring Tree.

I went online in search of a tree pattern. I saw loads of beautiful, funny trees. But nothing really what I had in mind. So I took out my crochet needle, brown fingering yarn and started to crochet. I really didn't know what was coming out in the end, I just pictured the tree in my head and just added row after row. Thank god, I typed along with what I was doing, this is something I sometimes forget and regret big time!

When I finished the tree and the first branches, I was thrilled. This was it! So I added some branches and weaved in the ends. But it was a bare tree. How am I going to do the leaves? Online you see a

Monday, August 26, 2013

Fishy fishy...

Instead of doing a bit of work today, I went to the shop and got stuff for our aquarium. Yes we are now the proud owner of a tank with water and 2 plants. We can't put any fish in there for at least 2 weeks, this is for the bacteria and the water to settle(???). I have no clue, but I'm willing to listen to the people who know about this stuff. So my day was spent, boiling the little stones for ground cover, to get rid of harmful bacteria.

The kids ran in the house expecting to see fishies. I didn't know how to explain it, so I just told them the fishies weren't born yet. And in 2 weeks time we're able to pick them up.


It's not really a good picture, but you get the idea.

I was working on a hat for myself and I was almost done, but not happy with it. So I started drawing, calculating and banging my head on the table repeatedly, but I think I have the answer now. I want a pop corn stitch beret. But with berets, the problem is in the circle. How do you get the round curve of the beret? It will always be with corners (in my case 6 corners) where the increases are. And there are numerous ways to do it I guess, but I wanted to solve the problem myself. So I think I have it now... working on Row 4, so it can go anywhere still. But so far it looks good!

With the hat, I want make a scarf, arm warmers, mittens and boot cuffs (or maybe legwarmers). But the thing is, I don't have that yarn any more and I bought it last year. So no way in h*ll am I going to get that same color back again. So I will make the hat in this color and the set in a different color! Here's a preview:


If you have a way of making the perfect circle and you would like to share it, please leave me a comment! I'll bet you I'm doing it the hard way and there is a really simple answer to this!

Update: This hat is driving me nuts!!!!

xoxoxo Patricia

Sunday, August 25, 2013

Hat Season Kick off! SALE! Yay! SALE!!!!

To kick off Crochet Hat Season, I'm offering 50 - 75 % discount on selected Hat Patterns on Etsy and Ravelry!

Visit my shops and get those heads covered for winter!