Showing posts with label haak patroon. Show all posts

Tuesday, September 2, 2014

Easy Peasy Top by Pukado - Free Pattern!!

Easy Peasy Top by Pukado
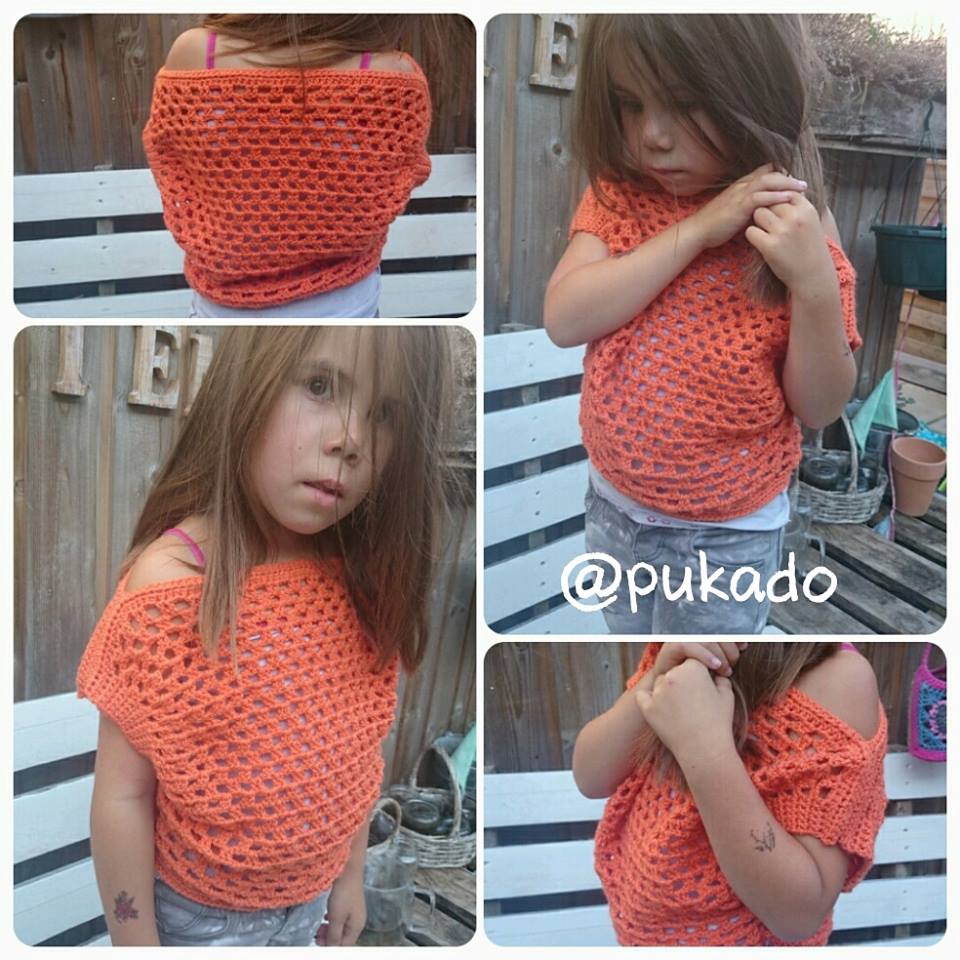


10615535_689319621157294_4564717193049762984_n.jpg


A little easy pattern to make something gorgeous!

download now on Ravelry


Yarn - Stylecraft DK
Hook size - 4mm
Yarn needle to weave in ends


Gauge:
Block is 2DC, CH2
4”x4” = 4.5blocks x 8rows


Beginning chain is an even amount of stitches plus 14
13 = 5, 5, 2, 4
Where 5 is the border for the arm part
2 is the first CH2 in the row of blocks and 2 is your begin chain at the start


I chained until it was the length from elbow to elbow and then added chains to get to an even number and added my 14 extra chains.
For my 6 yr old I chained 68 plus 14 = 82
For my 9 yr old niece I chained 80 plus 14 = 94


Length of the front and back part. For the CH82 I added 22 block rows, for the CH94 I added 25 block rows. Add enough rows that it will cover the front part of your body until your diaphragm (or half way your body).


Make 2, front and back


R1, Chain the amount required, turn, HDC in each chain, CH1 and turn
R2, SC in first 5st, CH2, skip 2st, *DC in next 2st, CH2, skip 2 st* repeat until the last 5st, SC in the last 5st, CH1 and turn
R3, SC in first 5st, 2SC in first CH2Space, CH2, *2DC in next CH2Space, CH2* repeat until the last CH2Space, 2SC in last CH2Space, SC in last 5st
R4, SC in first 5st, CH2, *2DC in next CH2Space, CH2* repeat until the last 5st, 2SC in last CH2Space, SC in last 5st
Repeat R3 and R4 until you have reached the length you require
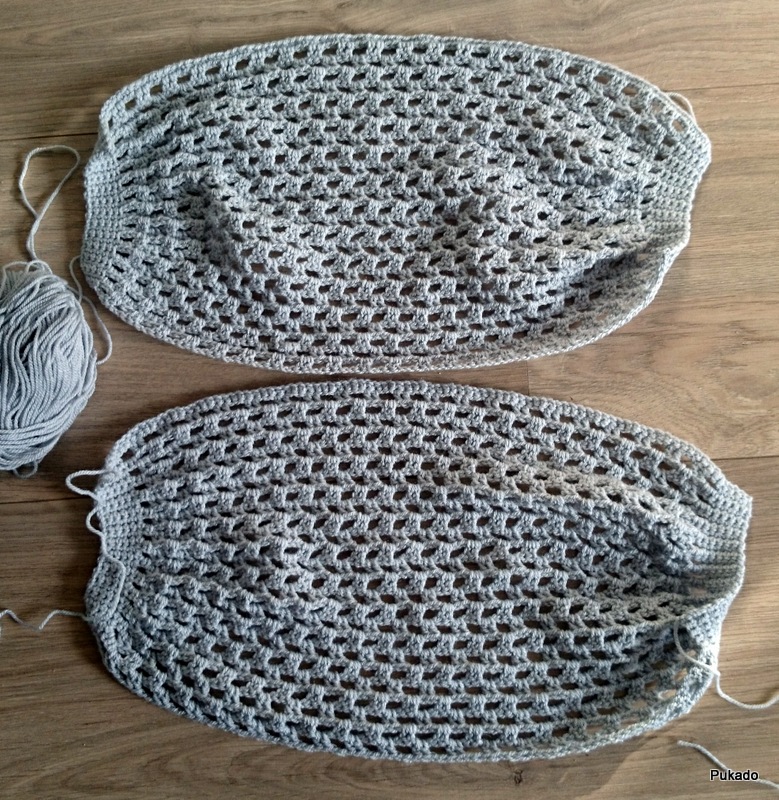

2014-08-31 08.52.28.jpg


Line up both parts at R1
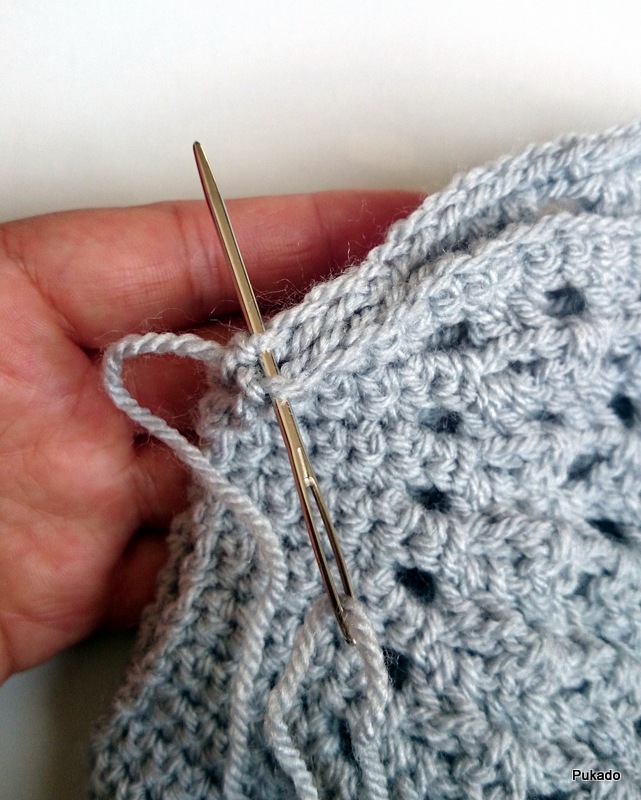
With yarn needle sew on both side the same amount of stitches together. I used the outer loops only, so front loop of front part and back loop of back part.
For the CH82, I stitched 17st together on both sides (68 divided by 4 = 17)
For the CH94, I stitched 20st together on both sides (80 divided by 4 = 20)
But you can add more stitches if you don’t want an open neckline like that.
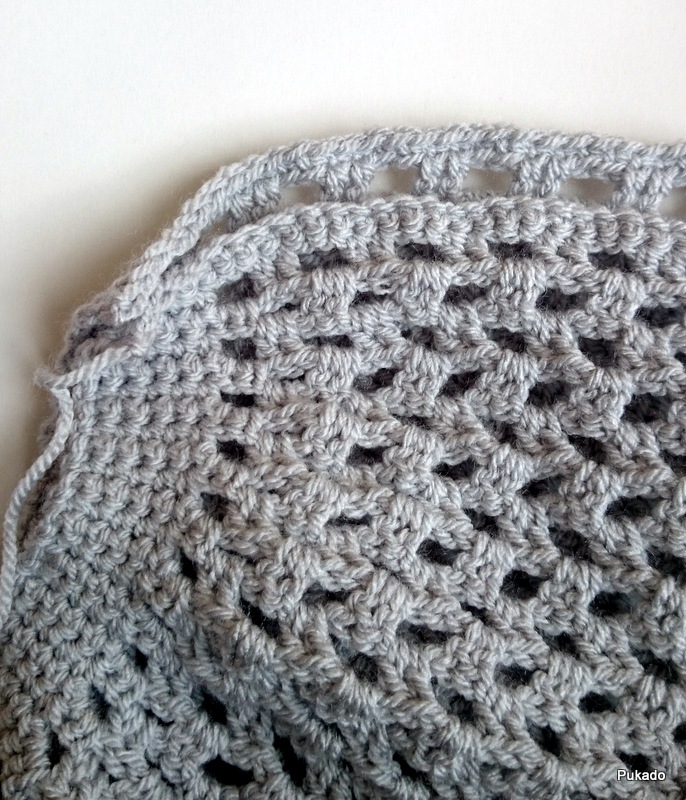
2014-08-31 08.53.55.jpg


2014-08-31 08.54.52.jpg


2014-08-31 08.57.33.jpg


Turn it around and stitch both SC part together on the bottom with 5 stitches.


2014-08-31 09.07.48.jpg
Weave in ends
Next part you will work in the round and decreasing with 1 block on the sides every row. Decrease until it will fit the waist of the person you’re making it for.


For the CH82, I decreased 4 rows
For the CH94, I decreased 5 rows.


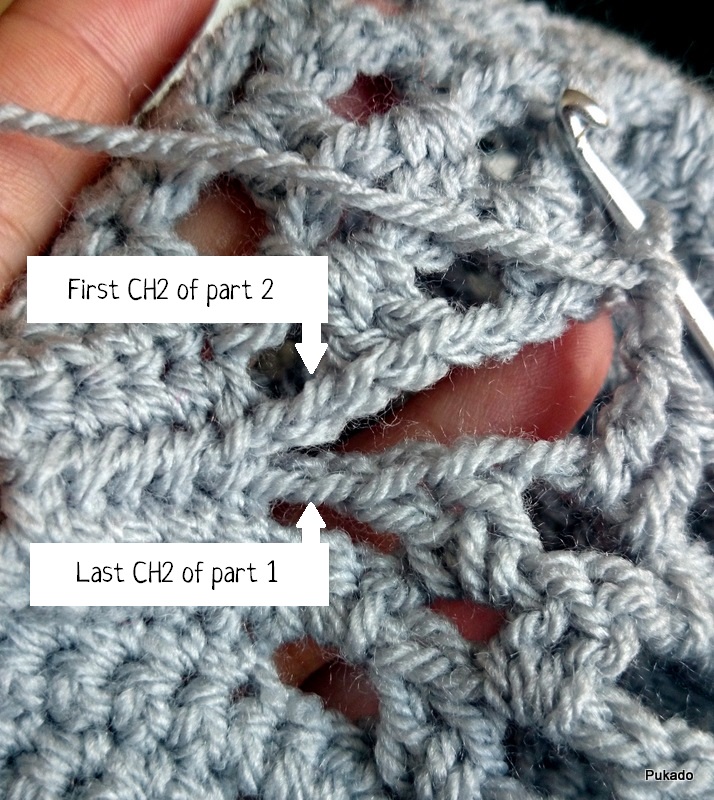
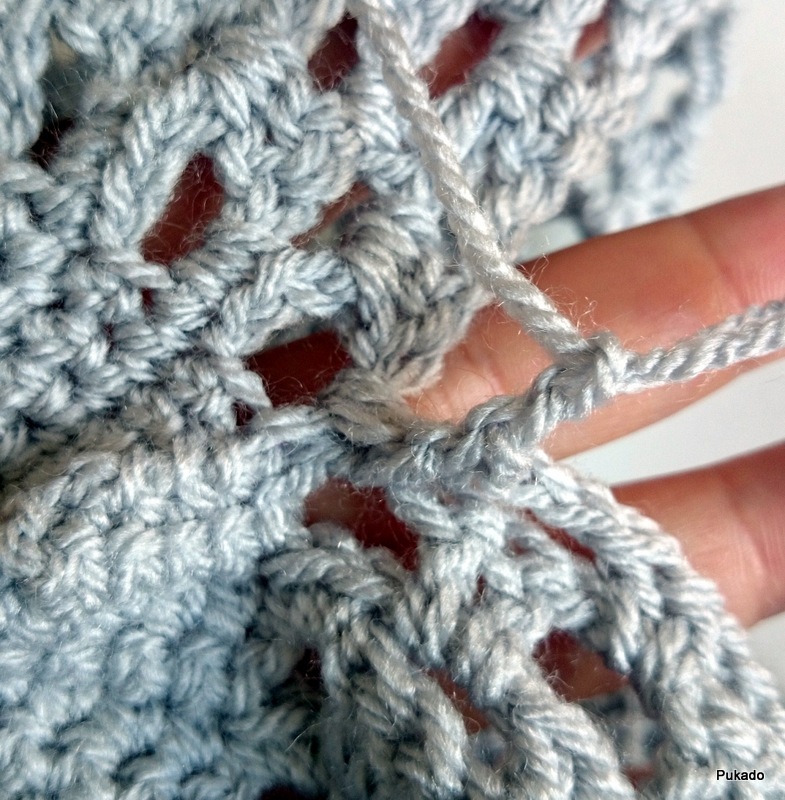
R1, SLST to a CH2Space in the middle of part 1 (only for first row), CH2, DC in same space, CH2, *2DC in next space, CH2* repeat until you reach last CH2Space, 2DC in last CH2Space of Part1 and first CH2Space of Part2, CH2, *2DC in next space, CH2* repeat until you reach last CH2Space, 2DC in last CH2Space of Part2 and first CH2Space of Part1, CH2, *2DC in next space, CH2* repeat until end, SLST to first DC, SLST into next CH2Space
Repeat R1 until it will fit the waist of the person you’re making it for.
2014-08-31 09.13.53.jpg2014-08-31 09.31.37.jpg
2DC around last CH2Space and first CH2Space


R2, CH2, DC in same space, CH2, *2DC in next space, CH2* repeat until end,  SLST to first DC, SLST into next CH2Space
Repeat R2 until you’re happy with the length. I only added 1 extra row as I wanted the top to be cropped. They will wear it with a tank top or t-shirt underneath.


Edging after you reached the desired length
R3, CH1, *2SC in CH2Space, SC in next 2st (on top of DC of previous row)* repeat around, SLST to first SC
R4, CH2, HDC in each st around.


Weave in ends


Other uses for this pattern, using only 1 part


Cowl
Just make 1 part, fold double lengthwise and stitch ends together to close it.


2014-09-02 09.55.58.jpg2014-09-02 09.58.04.jpg


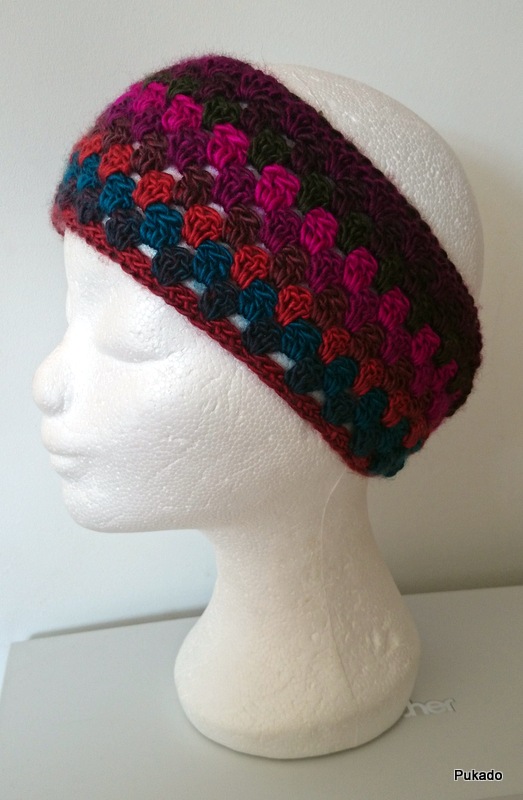
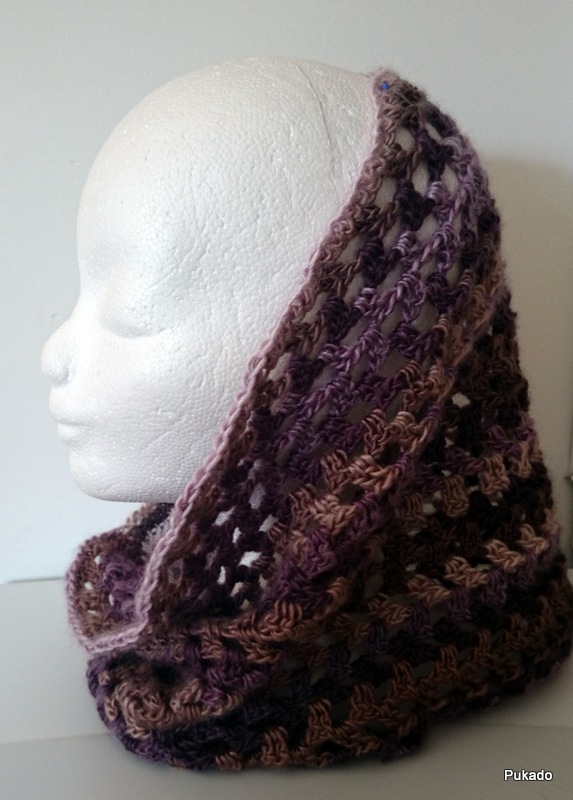
Or make a headband, Chain the amount that will fit around your head, make sure it’s and even number plus 13. Instead of HDC in first row, use SC. And edge bottom with SC, fold double lengthwise and stitch ends together to close it.

2014-09-02 09.53.54.jpg


Copyright Patricia Stuart 2014 ©.
You are free to create from the pattern and sell the creations.
Please do not copy, rewrite, resell or distribute as your own, this is prohibited.
Please give credit to my page for the pattern and if you sell finished items online,
please provide a link to my page for the pattern.
Thank you for your understanding.


Please visit my blog: Pukado - Blog
Please visit any of my shops at Etsy, Ravelry or Craftsy
FaceBook me! @Pukado
Follow me on Pinterest

Monday, August 19, 2013

Lacey Butterfly - Arm Warmers - Free Pattern

Normally my Patterns are big, with loads of things to do. But I was in the mood for something small and easy. Something cool and girly.

Arm Warmers.. they are getting really popular now and I think they're fab!

I was also thinking of Aoibhinn in Autumn wearing her t-shirts. If she wears arm warmers, she can wear her favorite t-shirts all year long! So I started looking for a stitch to use. I wanted something nice. I was looking at the broomstick lace stitch. But that just buggered me. Too much and if you don't do it right it looks like a mess.

I've found this pin on Pinterest and loved it. So I tried it out, made some changes and my arm warmer was on the way.


It's from this site and it's in Russian.

I made a pair for myself and my little lady in an evening. It's easypease!


You can download a printable version here.

Supplies:

Yarn. Any yarn would do, just add a multiple of 5 to get to the desired length.

Hook needle. It depends on the yarn which needle to use.

Yarn needle, to weave in ends.

Size:

This is very easy to convert to different size.

The length:
The begin chain has to be a multiple of 5 plus 3 for the first DC.
For a child aged 2-3 you chain 30 plus 3
Child aged 4-6 you chain 40 plus 3
Child aged 6-10 you chain 50 plus 3
Child/teen aged 10-14 you chain 60 plus 3
Teen/adult you chain 70 plus 3
Adult you chain 80 plus 3

The width:
Is changeable by adding rows of DC after R5 and R13
For a child aged 2-3 you add 1 row of DC
Child aged 4-6 you add 2 row of DC
Child aged 6-10 you add 3 row of DC
Child/teen aged 10-14 you add 4 row of DC
Teen/adult you add 5 row of DC
Adult you add 6 row of DC
And the same amount on the other side

The thumb hole
For a child aged 2-3 you add the thumb hole in the DC Row after R5, start with 4DC and CH2.
Child aged 4-6 you add the thumb hole in the DC Row after R5, start with 5DC and CH3.
Child aged 6-10 you add the thumb hole in the second DC Row, R7, start with 6DC and CH3.
Child/teen aged 10-14 you add the thumb hole in the second DC Row, R7, start with 6DC and CH4.
Teen/adult you add the thumb hole in the third DC Row, R8, start with 8DC and CH4.
Adult you add the thumb hole in the third DC Row, R8, start with 8DC and CH4.

This is a guideline, the size of the hook you use and the yarn is also important, for this pattern I used yarn 10wpi and hook 5 for the pink arm warmers and for the blue green arm warmers I used yarn 12wpi and hook 3.5. 

And don't forget to switch sides of the 
thumb hole  So the second arm warmer has the DC row with thumb hole on the second part of the arm warmer.

I will follow the pattern the teen/adult.


 R1, CH73, in third CH from hook and the next 4CH after that, pull up a loop, (you have 6 loops on your hook now, 5 big loops and your normal loop), insert hook through all loops, YO, pull through first 5 loops and make a SC with your normal loop, 4SC through the same 5loops, *pull up loop in next 5CH, 5SC through the same 5loops*, repeat till the end. Turn. - 70


R2, *CH4, SLST in between DCclusters*, repeat till end, CH3 and turn. - 70


R3, *pull up loop in next 5CH from R2, 5SC through the same 5loops*, repeat till the end. Turn. - 70


R4, *CH4, SLST in between DCclusters*, repeat till end, CH3 and turn.


R5, *Dc2together, DC, DC2together* in each CH4Space till end, CH3 and turn. - 42


R6 and R7, DC in each st till end, CH3 and turn. - 42


R8, DC in next 8st, CH4, skip 4st, DC in each st till end, CH3 and turn. - 42


(Picture is taken following pattern Child aged 2-3, therefore DC in 4st, CH2, Skip 2st, DC in rest)


R9 and R10, DC in each st till end, fasten off after R10. - 42


R11, SLST on the first CH of R1, *CH4, SLST in between DCclusters*, repeat till end, turn. - 70st


R12, *Dc2together, DC, DC2together* in each CH4Space till end, CH3 and turn. - 42


R13 and R17, DC in each st till end, CH3 and turn. - 42

Fold work, good side in, SLST both sides together using outer loops.


Edge topside (finger side) with SC.
Weave in ends.


Tip: The tail of the first Chain is finger side.


For the second arm warmer, switch rows 6 - 10 with rows 13 - 17. And on the thumb row, R15, DC in next 30st, CH4, skip 4st, DC in last 8st.


(Picture is taken following pattern Child aged 2-3, therefore DC in 12st, CH2, Skip 2st, DC in 4st)


Enjoy! Hope you like it!

xoxoxo Patricia

Getting Serious now...

Back to school for the kids!! *YAY* But that means for me a bit more time to get serious business done! This is the first year that I will have 4 days a week at least 4 hours of child free time and today is the first day and it's heaven ( I hear angels singing, I swear!)

I'm a stay at home mammie of two beautiful children. A girl, Aoibhinn (pronounce as Ayveen), 5 years old. A proper little lady, since three months actually. Before that I was convinced she was a boy. But the princess phase has started and mammie is finally allowed to buy dresses, skirts and frilly things! She's the artist in the family, she loves to draw, write and create (especially with loads of sticky tape, tiny pieces of paper and yarn ends of mammie's work). And my boy, Aodhan (pronounce as Aydan), 4 years old. He's a proper boy, loves to rumble and tumble, crazy about his electronic gadgets, cheeky and has a good sense of sarcastic humor and gloating.


We live in Zaandam, Netherlands. Pretty town, with a chocolate and a cookie factory. You can smell the chocolate when you step outside. When they make strawberry cookies, the air outside is so sweet scented, you will gain 3 pounds just by breathing! We moved here a year ago. Before that we have lived in Ireland for seven years. My husband and I moved there in 2005 for a change of scenery and a different way of live. We loved living in Ireland. It's so pretty! But my husband got the opportunity to work for the same company in the Netherlands. And with the kids almost at school age, we decided to come back. We love having our families and friends close again, but sometimes we do get homesick for Ireland.

Another reason why we have moved back, was that we needed better help for my little boy. When he was 18 months he was practically deaf. He had so much fluids in his ears that he couldn't hear. It was like hearing under water. He had grommets placed and the hearing came back. But no sounds from him. They told us he would start talking within 6 months. When he was 2 he still didn't talk, only a couple of sounds and grunts. So we went back to the hospital and they put us on a waiting list. The waiting list was 18 months!! We tried to get help, but every one told us to be patient, he will talk eventually. So when my hubby came home with the announcement that we could move back home again, I jumped on it for Aodhan.

As soon as we were settled in our new house, I started calling around. The GP referred us to the hospital. We got loads of help, but not the correct help. Finally after 9 months we found the help he needed. He's going to a special school now, for children with severe speech and language difficulties. He's really happy there and is learning to communicate. He can hear and understand you, but nobody could understand him. He's learning sign language now, which he does brilliantly! And he has now around 10 understandable words. We had to learn sign language as well, Aoibhinn is very good at it.


At the moment we're going down the neurological path. He has had EEG's and other tests. Tomorrow is the big MRI and he has to go under full anesthetics. A bit nervous about that. His EEG's were clean, so we don't have to worry about that. They tested his IQ and that was high, but disharmonious. They're trying to convince me about Autism. But I'm refusing that at the moment, because he is a very social boy. He's very sweet with other people, he loves meeting new people. He doesn't look you in the eye, because he's looking at your mouth and hands to understand you. He's a dreamer and will daydream away during the day, but that doesn't mean he is zoning out. He loves to play with his cars and line them up, but that isn't compulsory or repetitive. He will go sit next to a couple of people on a bench in the park, because they're laughing and it looks like fun to him. He will ask to play with your phone even though you're a complete stranger. He will say complete sentences in sounds with the right intonation, but with no words. So no, I don't think it's Autism for now. We will see...

But getting completely off topic there. This blog is about me and my hobby, Crochet. I started learning crochet last year in August 2012. My boy is crazy about Angry Birds and saw an Angry Birds hat. Trying to find a nice hat was difficult. But I found some crochet patterns. So I bought a hook and some yarn, went on youtube and thought myself to crochet. I finished the hat and my boy loved it! But then he got into Starwars and wanted a R2D2 hat. So again, I sat down with my hook and started figuring out with help of youtube and the many tutorials out there, how to make him a R2D2 hat. In the mean time, I found loads of fun patterns on the internet, that I just had to try out. So I was making hat after hat. The girl next door wanted a hat, so I made her an Owl hat. Very popular in her class, so I had to make another 5 hats. So I spend my winter making hats for every one, trying out new techniques, putting together patterns of Spider-Man hats, for Aoibhinn's classmates, the Little Lady hat, the Two Tone Beret, the My Little Pony, Pinky Pie and Rarity Hats for Aoibhinn and her friends.


After making 3 Spider-Man hats I was done with it. I hated repeating the same pattern over and over again! I wanted to do something new. So I set up an Etsy shop with my patterns. This way I could make a bit of money to pay for all the yarn I use. I only make hats now per request. In the beginning I was feeling uncomfortable asking money for it, but I work hard for it and put in a good few hours. So I'm entitled hahaha

Hat season came to an end and I fell into a black hole. What now? No more hats until next winter? So I started playing around with Granny Squares and amigurumi (I always say arumigumi, I hate this word!). I made a few things, but nothing really WOW, iykwim?

It was March and I was at home looking out of the window watching the snow fall. Yes, snow in March, what the flip? Spring should have been here! And my window looked so gloomy and depressing, so I came up with my spring bird idea. It was a hell of a struggle to get the pattern to work, but it did! Proud!


I loved it, the birds were so colorful and cheery. They just light up my day every time I look at them. My sister in law had to have them as well. So I made one for her. Then my friend wanted one in the baby room, so I made one for her. It wasn't difficult for me to make another one, like with the Spider-Man hats, I liked it. So I wrote down the pattern and started selling it on Etsy. I also started selling on Ravelry. It was a hit! Yay!

My next idea was a Spring Tree. I blogged about it before. I started out with the idea of crocheting the leaves, but I had just bought these beautiful ribbons. So I used those.

Then I thought, I could crochet an apple tree for my other window. I love apple trees! I found this cute pattern of apples and pears online at PlanetJune and wanted to make a tree so I could hang these apples in it! But I couldn't find a pattern of the tree I wanted, so I started tinkering away. Setting it up, taking it down, setting it up again, until I had the base I was happy with. I just let it grow out of my hands and yarn and was surprised myself when I had the tree done. I LOVED it! But it didn't say apple tree to me. It screaaaaamed Yellow Ribbon. So I put a ribbon around it. I was so happy!


After that it slowed down in the crochet department, because I was so busy with the boy, getting him into the school, going to the hospital with him for all kinds of tests and preparing for the summer holidays. I started some other projects, Aoibhinn's Fairy, the broken clock, the little owls from RepeatCrafterMe. I made some flipflops for Aoibhinn, but writing the pattern was a pain, so it's on the to-do list for next summer! And I made the Chevron Skirt, that was fun to make, but a lot of work!


And now that August is back, we can start making hats again, YAY!!! So I started out with bang!
I washed the R2D2 hat by accident on a hot wash, so it's ruined! Aodhan needs a new hat and he fell in love with the Minions this summer! So I made him Kevin the Minion Hat! He loves it, but knows it's for the winter.


I also made some arm warmers, because they're just so cool! I will post the pattern soon on my blog as a free pattern. And also as a free pattern I will post the Minion amigurumi pattern soon.

So keep a close eye on my blog!

xoxoxo Patricia

PS: I promise my next entry will not be that long!