
 Yay! It's time again for a new free pattern!
I have been working on this the last couple of days.. in between school runs, mad wednesday, housework (well not really... )
I have made this hat for me! I loved the first one I made, green, grey and white. But those are not my colors. So I made this one for me! And I will wear it all winter! And I hate selfies, so unless a really good one turns up you just have to believe me that it looks great (especially with the cowl and gloves I'll be making as well!).
I named it Robin, because it reminded me of the hat Robin Hood wears. My first name was Miss Dorothy, because of the spiral. But I liked Robin better.
So I hope you like it! And I would love to see pictures of your finished Robin Hat!
Supplies
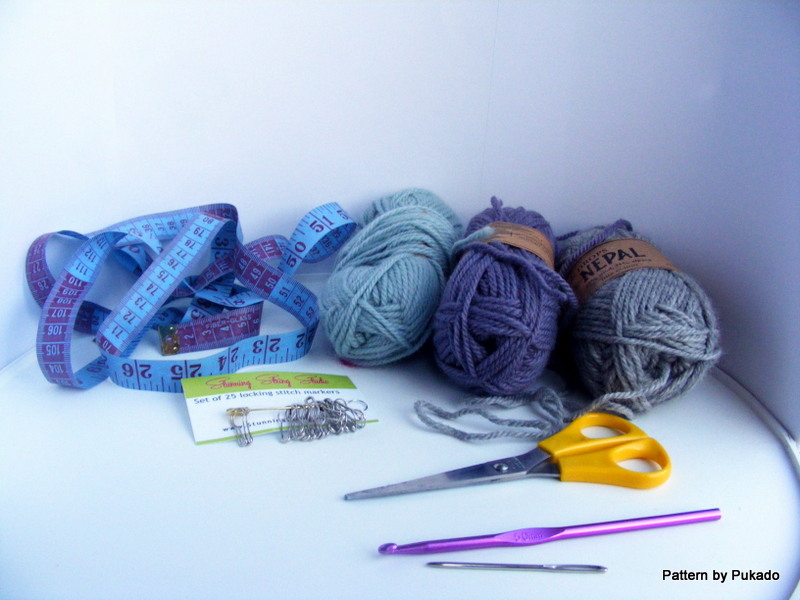
As usual I’m working with my lovely Drops Nepal yarn.
Drops Nepal, Yarn thickness group C, 50 gr = 82 yds
SC 10x10cm (4”x4”) = 17st x 22rows
HDC 10x10cm (4”x4”) = 13st x 11rows
in 3 different colors
Hook needle 5mm
Yarn needle to weave in ends
Stitch Markers
Stitches used:
MC - Magic Circle
CH - Chain
SLST - Slip Stitch
SC - Single Crochet
HDC - Half Double Crochet
FPHDC - Front Post Half Double Crochet
To make smaller, remove increase rows and adjust hat height.
R1, MC, Color A, 2SC, Color B, 2SC, Color C, 2SC - 6st


R2, Color A, 2HDC in next 2st of Color B
Color B, 2HDC in next 2st of Color C
Color C, 2HDC in next 2st of Color A - 12st

R3,
Color A, 2HDC in next st, HDC in next st of Color B times 2
Color B, 2HDC in next st, HDC in next st of Color C times 2
Color C, 2HDC in next st, HDC in next st of Color A times 2 - 18st

R3A
Color B, 2HDC in next st of Color C
Color C, 2HDC in next st of Color A - 4st

R4,
Color A, 2HDC in next 2st, HDC in next 2st of Color B, 2HDC in next st, HDC in next 2st
Color B, 2HDC in next st, HDC in next 2st of Color C times 2
Color C, 2HDC in next st, HDC in next 2st of Color A times 2 - 26st


Place your stitch markers

R5, Color A, 2HDC in next st, HDC in next 3st of Color B times 2
Color B, 2HDC in next st, HDC in next 3st of Color C times 2
Color C, 2HDC in next st, HDC in next 3st of Color A times 2 - 30st

R6,
Color A, 2HDC in next st, HDC in next 4st of Color B times 2
Color B, 2HDC in next st, HDC in next 4st of Color C times 2
Color C, 2HDC in next st, HDC in next 4st of Color A times 2 - 36st
R7,
Color A, 2HDC in next st, HDC in next 5st of Color B times 2
Color B, 2HDC in next st, HDC in next 5st of Color C times 2
Color C, 2HDC in next st, HDC in next 5st of Color A times 2 - 42st
R8,
Color A, 2HDC in next st, HDC in next 6st of Color B times 2
Color B, 2HDC in next st, HDC in next 6st of Color C times 2
Color C, 2HDC in next st, HDC in next 6st of Color A times 2 - 48st
R9,
Color A, 2HDC in next st, HDC in next 7st of Color B times 2
Color B, 2HDC in next st, HDC in next 7st of Color C times 2
Color C, 2HDC in next st, HDC in next 7st of Color A times 2 - 54st
R10,
Color A, 2HDC in next st, HDC in next 8st of Color B times 2
Color B, 2HDC in next st, HDC in next 8st of Color C times 2
Color C, 2HDC in next st, HDC in next 8st of Color A times 2 - 60st


At this stage I have reached a diameter of 17.5cm. This should fit an adult woman according to the graph above. This means I need to add rows until I reach hat height of 22-24cm. I’m adding 10 more single color rows.
R11, at the end of Color A place a stitch marker. This spot will be your row marker. In the following rows, once you come close to this point, place a stitch marker. Don’t worry about the extra stitch you have left after the 20HDC, this is the extra stitch you added in R3. You will add that on in the end.
R11-R20,
Color A, HDC in next 20st of Color B
Color B, HDC in next 20st of Color C
Color C, HDC in next 20st of Color A - 60st


R21,
Color A - no stitches
Color B - HDC until you’re even with Color A
Color C - HDC until you’re even with Color A

R22,
Color A, FPHDC in next 46st, 7 times: *2FPHDC, FPHDC around next post*
Color B, HDC in next 67st
Color C, HDC in next 67st - 67st
R23,
Color A, HDC in next 19st
Color B, HDC in next 20st
Color C, HDC in next 21st, SC in same stitch as last HDC,
6SC along short side, fasten off with invisible join, - 67st


Copyright Patricia Stuart 2013 ©. You are free to create from the pattern and sell the creations. Please do not give away or sell the pattern as your own.
Please visit my blog: Pukado - Blog
FaceBook me! @Pukado
Follow me on Pinterest
Gorgeous!!! And my namesake!
ReplyDeleteit's beautiful, I'm going to try it.... Hope I can do it. :)
ReplyDeleteThank you!
ReplyDeleteIf you need help, let me know!
What a fantastic idea. I love the spiral and your tutorial looks so easy to follow. I can't wait to give it a go. Thank you :)
ReplyDeletevery beautiful hat, but it was too hard for me! I wonder can this be done with one color and dc stitch.
ReplyDeleteHi Cindy, for the brim on the hat you need the 3 different rows coming together at the end. Could you please tell me what didn't work out for you, maybe I can help you? If you would like to make a beanie with the spiral, you can, you have to start with 2SC, 2HDC, 2DC in your magic circle and build on that (you can even start with a higher number of stitches in your magic circle).
DeleteThanks for the reply. tell you the truth, I'm a visual person. if you have a video tutorial for this hat that will be great. Thanks for the written instruction tho. this is very nice hat.
DeleteI'm sorry, I don't have a video and at the moment will not be able to make videos. Maybe in future...
DeleteThanks
Deletethank you. very good presentation
ReplyDeleteجميل جدا والشرح بسيط وواضح شكرا لكم
ReplyDeleteHi, the hat is gorgeous, I really like it. I just finished my hat (not this pattern, it's just from one color), and I would like to make a brim like this. Is it possible to make from one row (one color)? I'm beginner and I can't work it out.
ReplyDeleteHi Karolina, for this exact brim you need the 3 different rows to come together. What you can do for the brim is to add Front post stitches 3/4 of your hat (so if you have 60 stitches, you will add FP SC to the first 15 stitches and then FPHDC to the next 30 stitches and then turn and work HDC back 30 stitches etc etc and build up your brim like that.
ReplyDeleteHope this helps! Patricia
Hi Patricia. Thanx for your help, it's very useful. Finally I can finish my hat :-)
DeleteI look forward to your next beautiful creations. Have a nice day, K.
Hola Patricia, me encanta tu gorro!!! querría hacerlo pero en un solo color lo malo es que no hablo inglés y no me aclaro con la traducción automática de google. No sé si tengo la buena suerte de que tú hables español y puedas darme algunas indicaciones útiles o quizás mostrar un gráfico para hacer el ala que queda tan bonita.
ReplyDeleteEn cualquier caso felicidades por tu creación y un saludo.
Hi Elena, Thank you for your message. I'm sorry but I don't speak Spanish. I used google translation for your message. You can make it in 1 color, but you need 3 skeins of yarn to work with to get the rim right. I don't have charts yet. I will be looking into that coming year.
DeleteBest wishes, Patricia
I don't understand the directions for the Robin Hat starting at R21. I'm using one color this is just a practice hat.
ReplyDelete