Showing posts with label toy. Show all posts

Monday, May 19, 2014

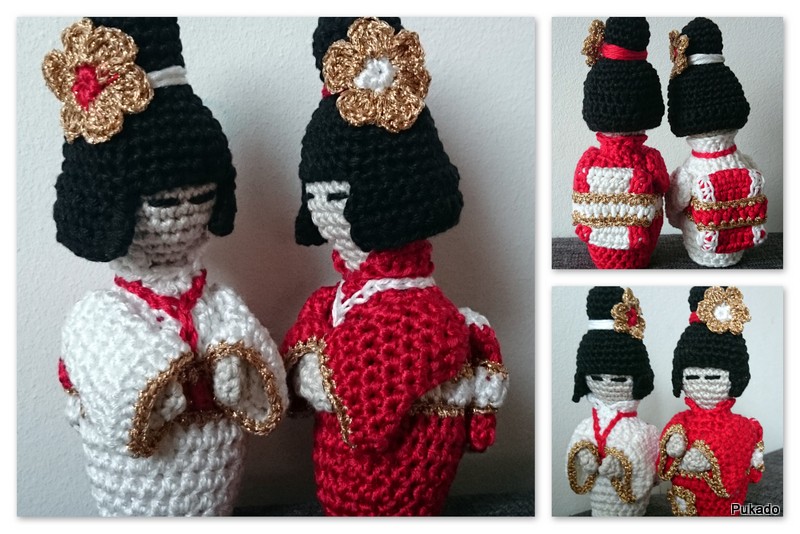
Kokeshi Doll - Free Pattern by Pukado

Kokeshi Doll By Pukado
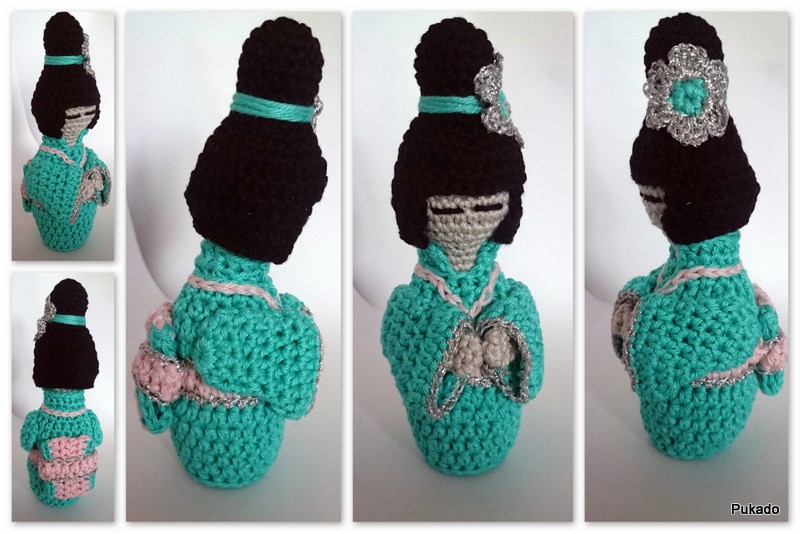

Kokeshi2.jpg

Supplies


Yarn
2014-05-13 09.36.50.jpg

You can use any yarn you would like, The chunkier the yarn, the bigger the doll will be.


For the doll in this pattern I will use Phildar Coton 3 in 4 colors


Dress - Piscine
- Rosee
- Phildar Sunset Silver
(You can use another contrasting color instead of the silver, just make sure it’s the same weight as your coton)
Face and Hands - Perle
Hair - Noir


Hook size 2.5mm


Scissors
Yarn needle
Stitch Markers


I have made another set as well with Drops Viscose. This will give you a nice soft and shiny dress. I used the same hook size. See image on last page.


This pattern is worked in rows. I use my Invisible Seam Technique to join the rows where I can, otherwise I will CH1 or CH2 to start a row and SLST to the first ST again to close the row . But you can use any way of joining you prefer.


Body


Use main color


R1, MC, CH2, 9HDC in MC, SLST to first DC - 10st
R2, 2HDC in each st - 20st


To set up your stitch for the next row, drop loop from hook, insert hook from back in the joining stitch, pick up loop, pull loop through from front to back, CH2
Kokeshi.jpg
R3, BPHDC in each st - 20st
R4, HDC in each st - 20st
R5, *2HDC, HDC in next 3st* - 25
R6, HDC in each st -25st
R7, *2HDC, HDC in next 4st* - 30st
R8, HDC in each st - 30st
You can fasten off or use a stitch marker.
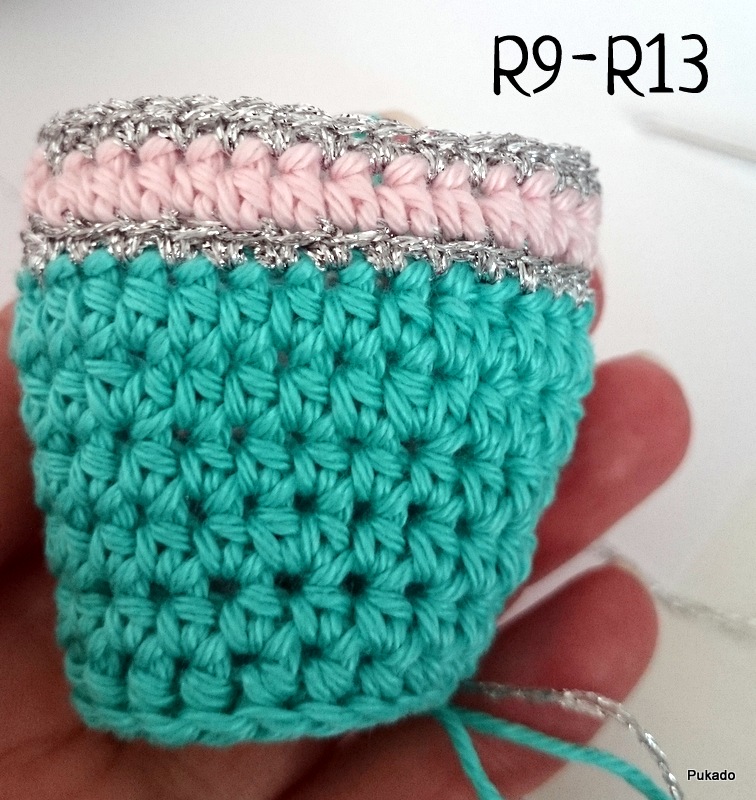

2014-05-13 10.43.05.jpgChange color to Silver. As this is a thinner yarn, I will make 2 rows of Silver in the same stitch of R7. If you use yarn the same thickness as your main color, you can do just 1 row.


R9-R10, SC in each st of R7 - 30st
You can fasten off or use a stitch marker.


Change color to contrast color


R11, HDC in each st, use Back Loop only - 30st
Fasten off with invisible join


Change color to Silver. As this is a thinner yarn, I will make 2 rows of Silver in the same stitch of R11. If you use yarn the same thickness as your main color, you can do just 1 row.


R12-R13, SC in each st of R10 - 30st
Fasten off with invisible join


2014-05-13 11.08.44.jpg2014-05-13 11.00.18.jpgR14, HDC in each st, use Back Loop only - 30st


R15, *HDCdec, HDC in next 4st - 25st


R16, *HDCdec, HDC in next 3st - 20st


R17, *HDCdec, HDC in next 2st - 15st


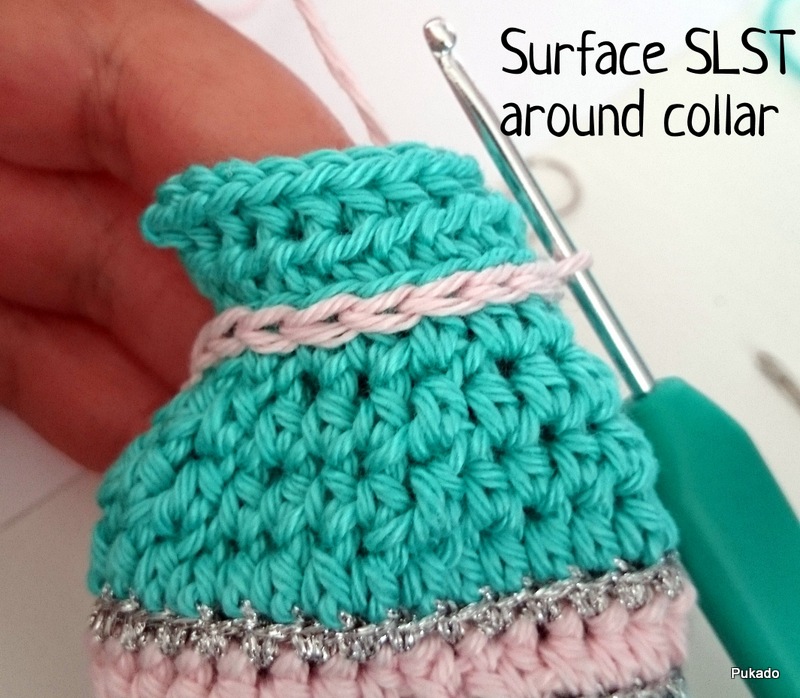
R18, CH2 and turn, HDC in the next 14st in Front Loop only, to make collar of dress, CH1, turn,  SC in same st, FPSC in each next st back to first st. fasten off, weave in ends


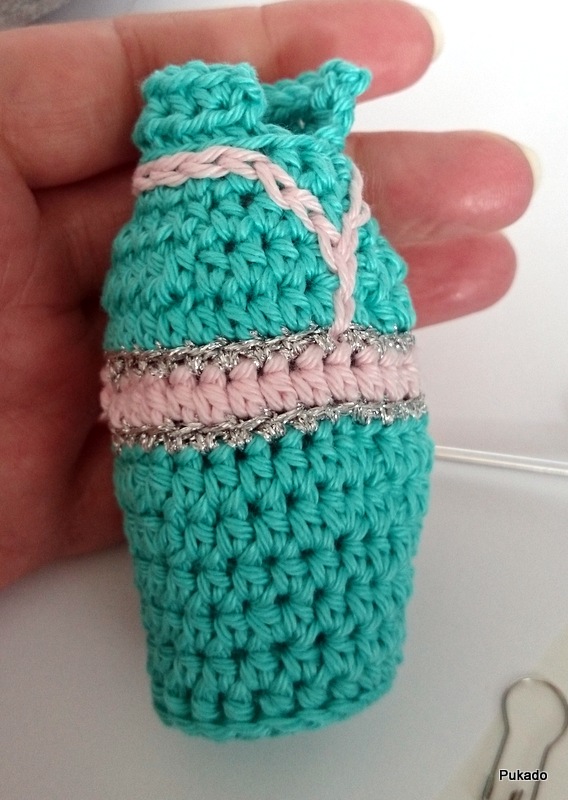
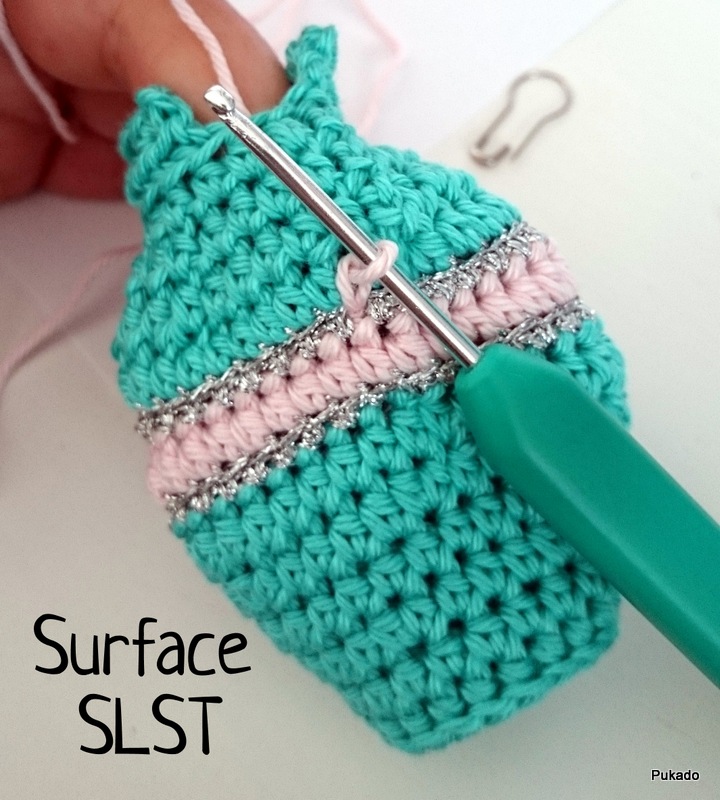
SLST with contrast color V neck on body and around collar.
2014-05-13 11.10.18.jpg2014-05-13 11.11.38.jpg2014-05-13 11.14.04.jpg

Sleeves


2014-05-13 12.37.05.jpg

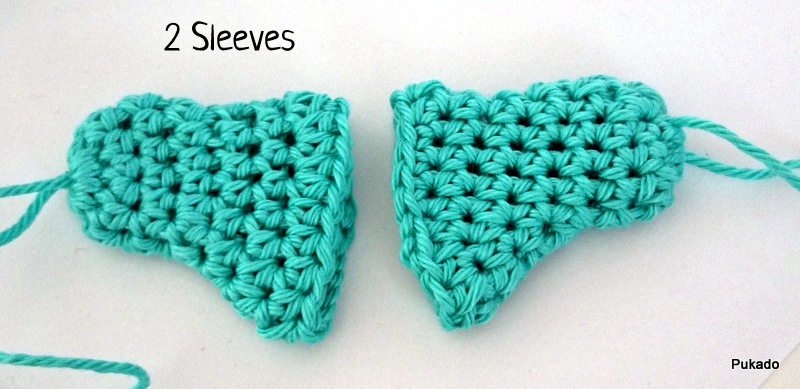
Make 2 in main color


Work in continuous rounds, use stitch marker
Leave long tail for attaching later.


R1, MC, 10SC in MC - 10st
R2, HDC in each st - 10st
R3, 2HDC in next st, HDC in next 4st, 2HDC in next st, HDC in next 4st - 12st
R4, HDC dec, HDC in next 4st, 2HDC in next 2st, HDC in next 4st - 13st
R5, HDC dec, HDC in next 4st, 2HDC in next 2st, HDC in next 3st, HDC dec -13st
R6, HDC dec, HDC in next 4st, 2HDC in next 3st, HDC in next 4st - 15st
R7, HDC in next 7st, 2HDC in next 2st, HDC in next 5st, 2HDC in next - 18st
R8, 2HDC in next, HDC in next 3st, SC in next 3st, SLST in next 2 st, join with invisible join and weave in end - 11st - you will have 20st now in total
Edge around with Silver. SLST to R7 or R8, on the back of the sleeve.
R9, SC in each st of R7 and R8, 2SC on top of the 2HDC of R7 and R8  - 22st


Attach sleeves to body around shoulders with a few stitches. Top 4 rows of sleeve lines up with R15 of body. Space between sleeves on back is 6st.


2014-05-13 12.54.29.jpg
Back piece


In contrast color
Leave a long tail


2014-05-13 13.31.05.jpgR1, CH18,HDC  in third CH from hook, HDC in next 15CH - 16st
R2-R4, HDC in each st - 16st


Add a row of SC on each side of the back piece with main color
Weave in all ends, except tail end. Use tail end to stitch short sides of back piece together.
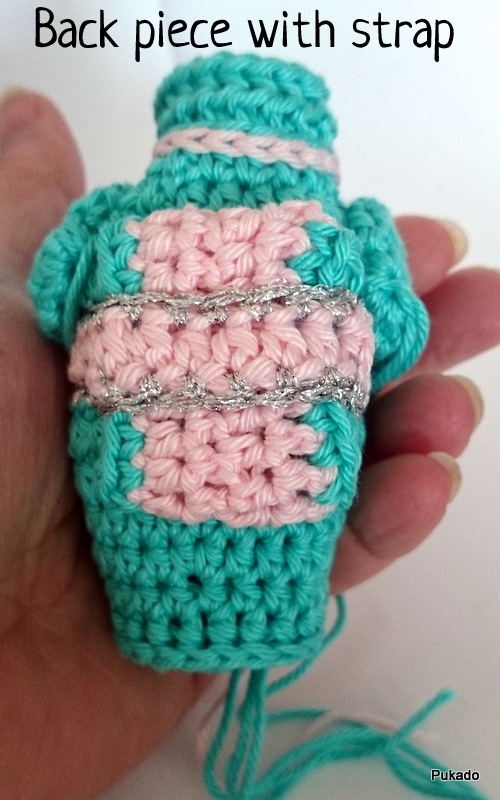
2014-05-13 13.45.33.jpg

Strap, with contrast color:
R1, Ch16, HDC in third CH from hook, HDC in next 13CH


Edge around with Silver
R2, SC in each st of R1 on both sides


2014-05-13 13.54.19.jpgSew strap on back piece with a couple of stitches.
Add back piece to body, strap and stripe lining up, secure with a few stitches.


Stuff body with filling


Hands
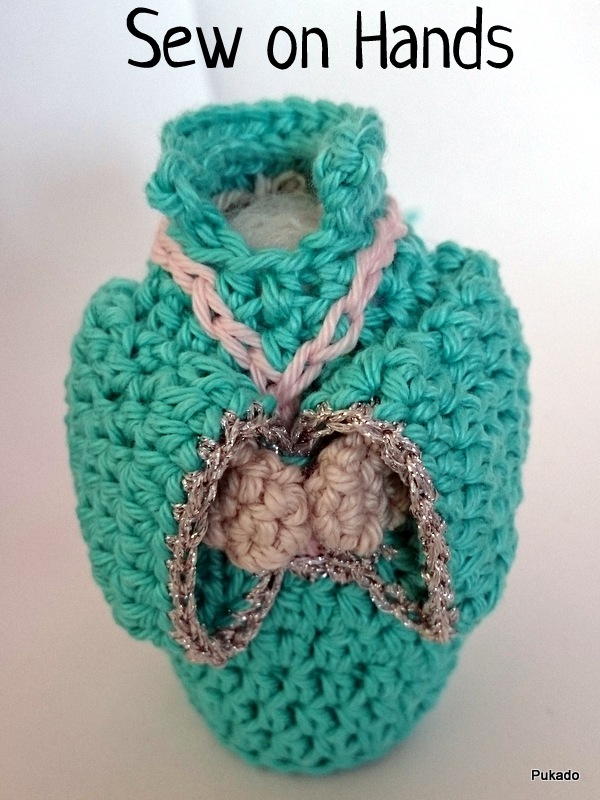


2014-05-13 14.26.00.jpg2014-05-13 14.19.28.jpgMake 2, use the Perle


Work in continuous rounds
R1, MC, 4SC in MC - 4st
R2, 2SC, SC, 2SC, SC - 6st
R3-R5, SC in each st - 6st


Do not use filling. Place hand in each sleeve and sew on.


Head


2014-05-13 15.43.37.jpgSLST to first st to join each row, CH1 to begin


R1, MC, 5SC in MC - 5st
R2, 2SC in each st - 10st
R3, *2SC, SC in next st* repeat around - 15st
R4, *2SC, SC in next 2st* repeat around - 20st
R5, *2SC, SC in next 3st* repeat around - 25st
R6, *2SC, SC in next 9st* repeat around, last series has only SC in last 4st - 28st
R7-R8, SC in each st - 28st
R9, *SCdec, SC in next 9st* repeat around, last series has only SC in last 4st - 25st
R10, *SCdec, SC in next 3st* repeat around - 20st
R11, *SCdec, SC in next 2st* repeat around - 15st
R12, *SCdec, SC in next 3st* repeat around - 12st
R13-R15, SC in each st - 12st


Hair


SLST to first st to join each row, CH1 to begin


2014-05-13 20.01.49.jpg

R1, MC, 5SC in MC - 5st
R2, 2SC in each st - 10st
R3, *2SC, SC in next st* repeat around - 15st
R4-R7, SC in each st - 15st
R8, FPSC in each st - 15st
R9, *2SC, SC in next 2st* repeat around - 20st
R10, *2SC, SC in next 3st* repeat around - 25st
R11, *2SC, SC in next 9st* repeat around, last series has only SC in last 4st - 28st
R12-R13, HDC in each st - 28st
R14, CH2, HDC in same st, HDC in next 19st - 20st
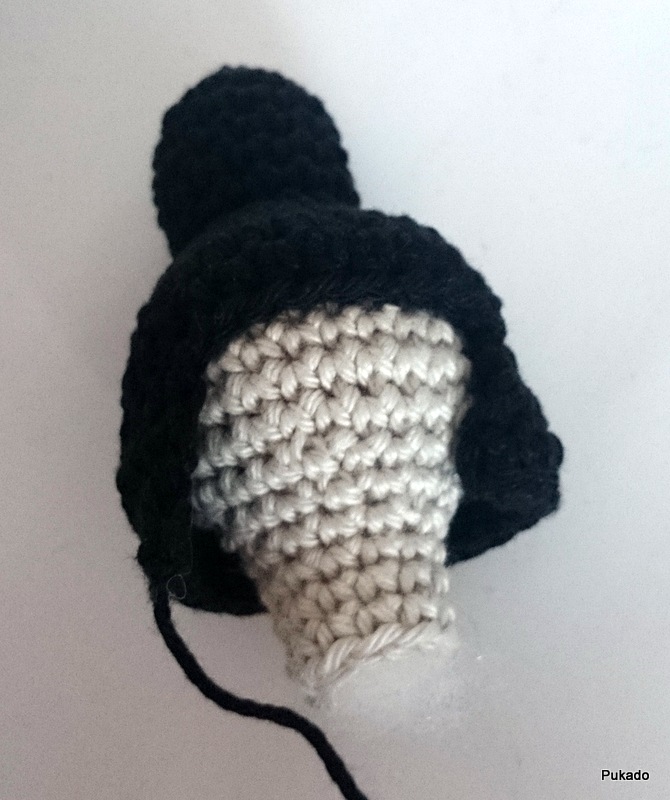
2014-05-13 20.02.26.jpg
R15, CH2, HDC in same st, HDC in next 18st, 2HDC in last st - 21st
R16, CH2 and turn, HDC in same st, HDC in next 9st, HDC dec, HDC in next 9st - 20st


Fasten off, leave a long tail. Stuff filling in top part of the hair.


Flower
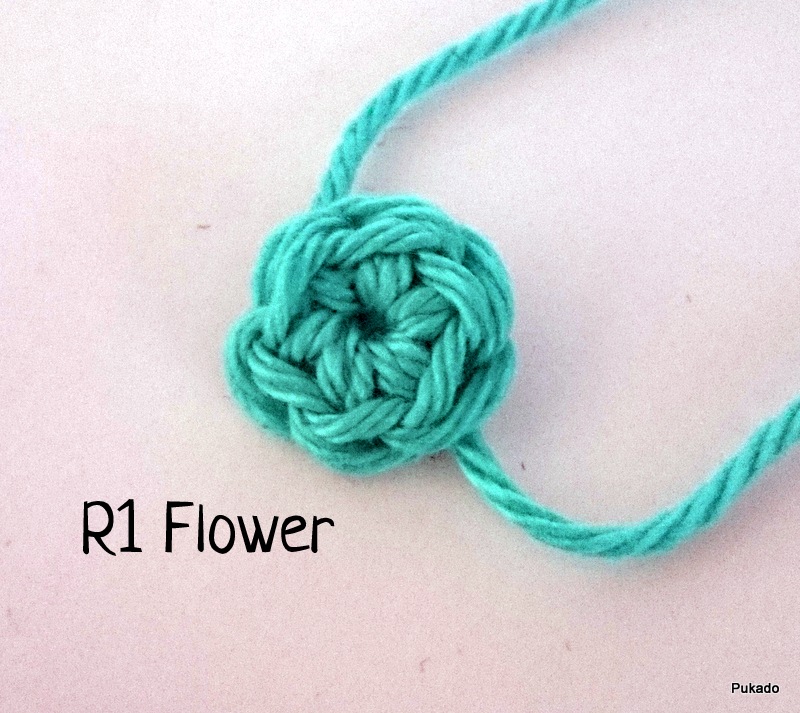


2014-05-13 20.11.29.jpgR1, with main color, MC, 5SC, join with invisible join - 6st, leave long tails


2014-05-13 20.13.16.jpgR2, SLST with Silver to st, *CH2, 4DC in same st, CH2, SLST in same st, SLST in next st* repeat for all 6st to create the 6 petals. Leave one long tail to stitch petals to hair


Fasten off, weave in ends.


Assembly Head


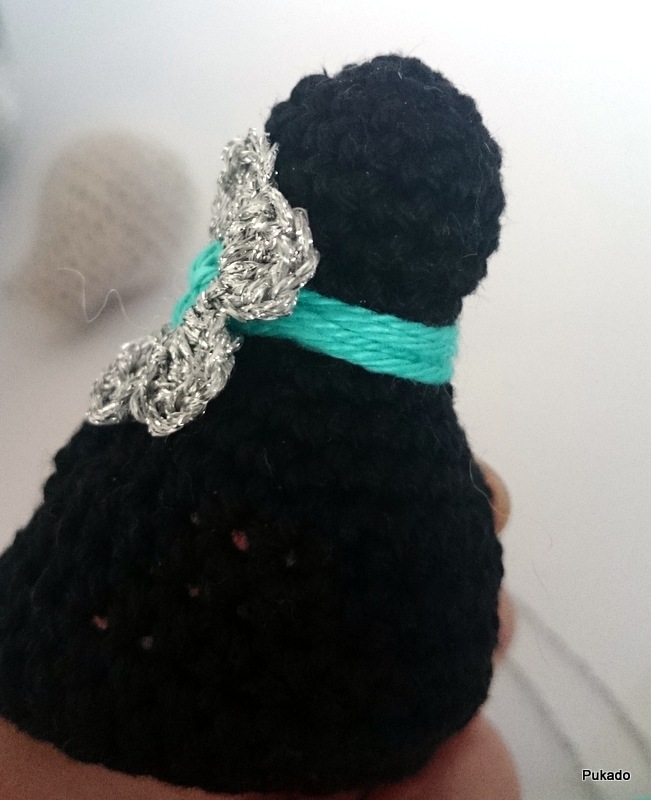
Place flower on top of seam of the hair, with the main color tails, wrap around the top part of the hair a couple of times. Stitch flower in place.


Stitch with the silver tail and small stitches, the petals in place on the hair.
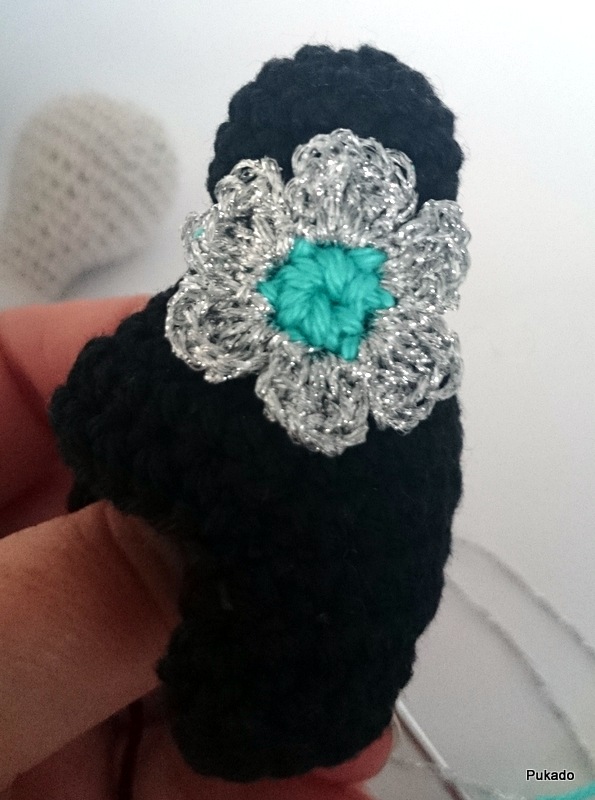

2014-05-13 20.28.07.jpg2014-05-13 20.28.13.jpg


Place head on body and stitch with main color in place.


Place hair on top of head and stitch secure with a couple of stitches with the tail. Use the tail to stitch the eyes in place. Weave in ends.


2014-05-13 20.31.50.jpg2014-05-13 20.40.57.jpg2014-05-13 20.46.09.jpg


Kokeshi1.jpg


Copyright Patricia Stuart 2014 ©.
You are free to create from the pattern and sell the creations.
Please do not copy, rewrite, resell or distribute as your own, this is prohibited.
Please give credit to my shop for the pattern and if you sell finished items online,
please provide a link to the shop (www.pukado.etsy.com) for the pattern.
Thank you for your understanding.


Please visit my blog: Pukado - Blog
Please visit any of my shops at Etsy, Ravelry or Craftsy
FaceBook me! @Pukado
Follow me on Pinterest

Thursday, February 13, 2014

Free Pattern - Toy - WaterMelophant Handpuppet - LOVE!

I was watching "Cloudy with a Chance of Meatballs 2" with the kids. And just the idea of food and animals combined was brilliant in my mind! Amazing the foodimals they have come up with, Fla-Mango's, Shrimpansees and so many more! And off course the WaterMelophant! So funny! And I and the kids fell in love with them.

I had a few ideas in my head forming and I started playing with my Phildar and needle... and 2 days later this is the result!


I LOVE IT!!! And so do the kids!!!

I wrote the pattern down while making it. I haven't tested it and hoping by following it, you will have the same result. To make it bigger, you have to adjust the increase rows in the beginning, but once you increase them, you have to increase the mouth circle and the trunk. So write down what you do!

If you have any questions, let me know!

Pattern after the break!

Monday, August 19, 2013

Minion Mania!

As mentioned before, my kids fell in love with the Minions after watching Despicable Me 2.
And to be honest, I did as well, they are just too cute and I want a couple of them running around the house! Life would be so much easier, wouldn't it?


So I made a little Minion. The kids were fighting over it... so I made another one, Minion 2.0. But then I had to make another one, a bigger one.. Minion XL

So I have 3 Minions flying around the house!


So here's the pattern. You can download a printer friendlier version here!


Minion amigurumi 

Supplies:

Hook Needle 2.5mm
Coton, I used Phildar Coton 3, in colors Yellow, Blue, Black, White, Silver Grey
Yarn Needle
Stuffing

Body
--------------------------------------------------------

This pattern is for the small Minion at the left.

R1 Magic circle, CH1, 5SC in circle, SLST to first SC, Ch1, SC in same st, 2SC in each ST all around – 12st
R2 Ch1, SC in same st, , SC in next st, *2SC, SC in next st* repeat from * all around, SLST to first SC – 18st
R3 Ch1, SC in same st, , SC in next 2st, *2SC, SC in next 2st* repeat from * all around, SLST to first SC – 24st
R4 Ch1, SC in same st, , SC in next 3st, *2SC, SC in next 3st* repeat from * all around, SLST to first SC – 30st
R5 Ch1, SC in same st, , SC in next 4st, *2SC, SC in next 4st* repeat from * all around, SLST to first SC – 36st
(If you want to make the body bigger, add on rows with increases until happy, make sure you increase the number of Rounds, the amount of Blue and Yellow st as in R15, lengthen the arms, add rounds on the legs, etc!!!)
R6 CH1, SC in same st, SC in next 34st, skip last st, SLST to first SC - 36st
R7 CH1, SC in next st, SC in next 34st, SLST to first SC - 36st
R8 CH1, SC in same st, SC in next 34st, skip last st, SLST to first SC - 36st
Switch to Black
R9 CH1, SC in same st, SC in next 34st, skip last st, SLST to first SC - 36st
R10 CH1, SC in next st, SC in next 34st, SLST to first SC - 36st
Switch back to Yellow
R11 CH1, SC in same st, SC in next 34st, skip last st, SLST to first SC - 36st
R12 CH1, SC in next st, SC in next 34st, SLST to first SC - 36st
R13 CH1, SC in same st, SC in next 34st, skip last st, SLST to first SC - 36st
R14 CH1, SC in next st, SC in next 34st, SLST to first SC - 36st

Sow on Eye(s) on R9 and R10, Add Hair, Embroider on Mouth

Start with Blue
R15 CH1, SC in same st, SC in next 4st, Switch to Yellow, SC in next 8st, Switch to Blue, SC in next 10st, Switch to Yellow, SC in next 8st, Switch to Blue, SC in next 4st, skip last st, SLST to first SC - 36st
Start with Blue
R16 CH1, SC in next 4st, Switch to Yellow, SC in next 8st, Switch to Blue, SC in next 10st, Switch to Yellow, SC in next 8st, Switch to Blue, SC in next 5st, SLST to first SC - 36st
With Blue
R17 CH1, *SCDEC, SC in next 4 st*, repeat all around, SLST to first SCDEC - 30st
R18 CH1, SC in each st around, SLST to first SC - 30st
R19 CH1, *SCDEC, SC in next 3 st*, repeat all around, SLST to first SCDEC - 24st

         Sow on Arms and Overall Straps and Start stuffing

R20 CH1, *SCDEC, SC in next 2 st*, repeat all around, SLST to first SCDEC - 18st

Starting with legs, 
Left leg
R21 CH1, SC in same st, SC in next 8st, CH3, SLST to first SC - 12st
R22 CH1, *SCDEC, SC in next 2st*, repeat all around, SLST to first SCDEC - 9st
R23 CH1, SC in same st, SC in next 8st, SLST to first SC - 9st
Switch to Black
R23 CH1, SC in next 4st, 2SC, SC in next 4st, SLST to first SC - 10st
R24 CH1, SC in next 4st, 2SC in next 2st, SC in next 4st, SLST to first SC - 12st
R25 CH1, *SCDEC, SC in next st*, repeat all around, SLST to first SCDEC - 9st
Start stuffing
R26, CH1, SCDEC all around, SC in last st, SLST to first SCDC - 5st

With Yarn needle fasten off and pull closed.

Right leg
SLST to the last SC of R20
R22 CH1, SCDEC, SC in next 2st along Chain from R21, *SCDEC, SC in next 2st*, repeat all around, SLST to first SCDEC - 9st
R23 CH1, SC in same st, SC in next 8st, SLST to first SC - 9st
Switch to Black
R23 CH1, SC in next 4st, 2SC, SC in next 4st, SLST to first SC - 10st
R24 CH1, SC in next 4st, 2SC in next 2st, SC in next 4st, SLST to first SC - 12st
R25 CH1, *SCDEC, SC in next st*, repeat all around, SLST to first SCDEC - 9st
Start stuffing
R26, CH1, SCDEC all around, SC in last st, SLST to first SCDC - 5st
With Yarn needle fasten off and pull closed.

Arms
--------------------------------------------------------

Make 2

R1 CH7, 
R2 SC in sec CH from hook (work in the loop on the back of the chain), SC in next 5st
R3 CH1, SLST using front loops of both CH R1 and ST R2 until end
R4 CH1, SLST on other side using back loops of both CH R1 and ST R2 until end
R5, CH1, 3SC on top of arm to start beginning of hand, turn
Switch to black
R6, CH1, SC in the same st, SC in next 2st, 
Finger 1: CH3, SC in sec CH from hook, SC in next, SLST in bottom SC, move on to next st
Finger 2: CH3, SC in sec CH from hook, SC in next, SLST in bottom SC, move on to next st
Finger 2: CH3, SC in sec CH from hook, SC in next, SLST in bottom SC, Fasten off and weave in.

Overall Straps
--------------------------------------------------------

CH8, leave long tails for sowing on body on both sides.

Eye(s)
--------------------------------------------------------

Start with White
MC, CH1, 5SC in circle, SLST to first SC- 6st (if you want bigger eyes, just add more SC in MC)
R1 Ch1, SC in same st, 2SC in each ST all around – 12st
R2 Ch1, SC in same st, SC in next st, *2SC, SC in next st* repeat from * all around, Fasten 
off to first SC with Invisible Join – 18st
Switch to Silver Grey
R3, SLST to R2 in front loop only. SC in each st around in front loop only, fasten off to first SC with Invisible Join - 18st
R4, SLST to R2 in back loop only. SC in each st around in front loop only, SLST to first SC - 18st
R5, CH1, SC in each st around - 18st

With Black, make 2:
MC, CH1, 5SC in circle, Invisible Join to first SC - 6ST
Sow on the white of the eyes

Hair
--------------------------------------------------------

Hair 1: On top of head in one place

With Black
Cut 8 lengths of 10 cm, Take 1 length, fold double and SLST around post in between R1 and R2, repeat with other lengths.

Cut 10 lengths of 15 cm, knot them together in a big knot and with hook needle pull all 10 lengths through the centre of the Magic Circle of Body

With yarn needle and yarn, wind yarn 4 times around all lengths at the base of the hair and pull tight, secure knot, and cut of lengths at desirable height, around 2 cm.

Hair 2: Random hair sticking out

Cut 18 lengths of 10 cm, Take 1 length, fold double and SLST randomly around post in between st, repeat with other lengths, cut of lengths at desirable height, around 2 cm.

--------------------------------------------------------


I hope you enjoy it!

xoxoxo Patricia