
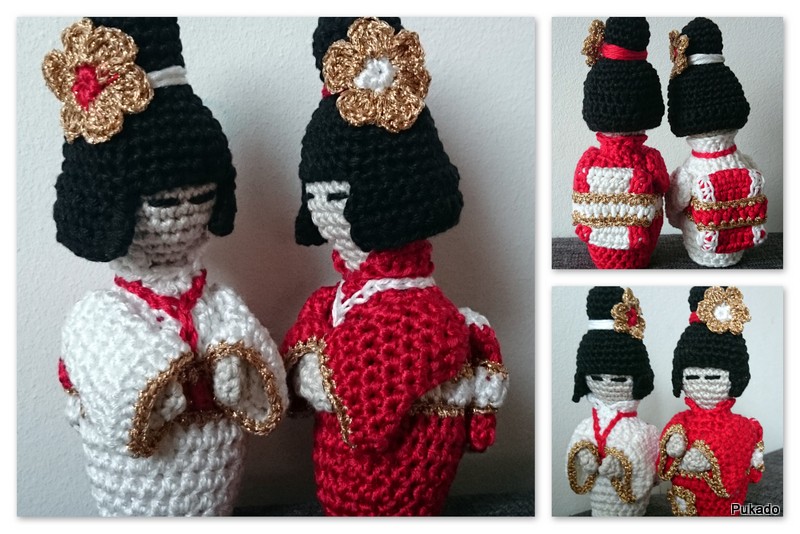
Kokeshi Doll By Pukado
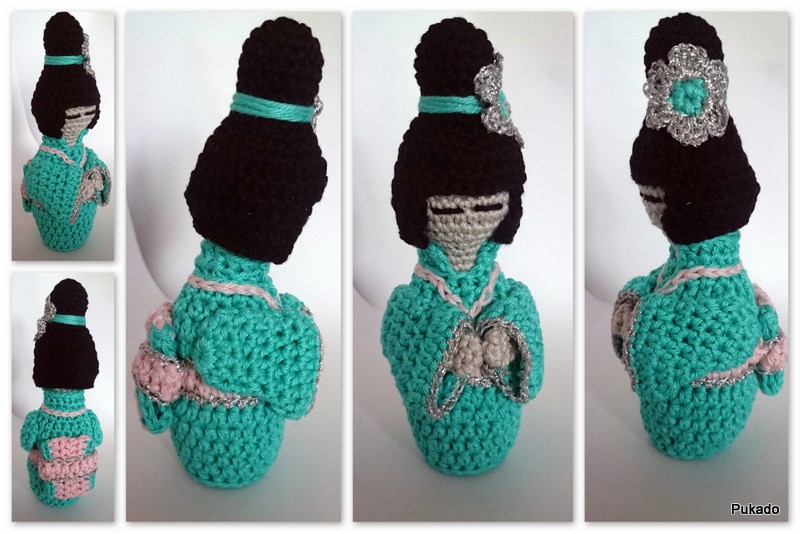
Supplies
Yarn

You can use any yarn you would like, The chunkier the yarn, the bigger the doll will be.
For the doll in this pattern I will use Phildar Coton 3 in 4 colors
Dress - Piscine
- Rosee
- Phildar Sunset Silver
(You can use another contrasting color instead of the silver, just make sure it’s the same weight as your coton)
Face and Hands - Perle
Hair - Noir
Hook size 2.5mm
Scissors
Yarn needle
Stitch Markers
I have made another set as well with Drops Viscose. This will give you a nice soft and shiny dress. I used the same hook size. See image on last page.
This pattern is worked in rows. I use my Invisible Seam Technique to join the rows where I can, otherwise I will CH1 or CH2 to start a row and SLST to the first ST again to close the row . But you can use any way of joining you prefer.
Body
Use main color
R1, MC, CH2, 9HDC in MC, SLST to first DC - 10st
R2, 2HDC in each st - 20st
To set up your stitch for the next row, drop loop from hook, insert hook from back in the joining stitch, pick up loop, pull loop through from front to back, CH2

R3, BPHDC in each st - 20st
R4, HDC in each st - 20st
R5, *2HDC, HDC in next 3st* - 25
R6, HDC in each st -25st
R7, *2HDC, HDC in next 4st* - 30st
R8, HDC in each st - 30st
You can fasten off or use a stitch marker.
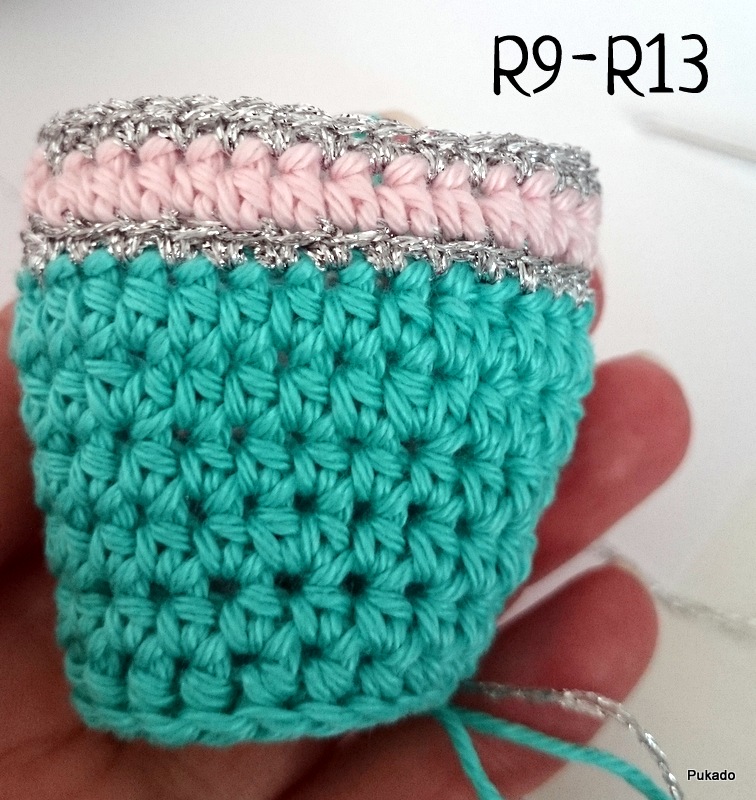 Change color to Silver. As this is a thinner yarn, I will make 2 rows of Silver in the same stitch of R7. If you use yarn the same thickness as your main color, you can do just 1 row.
R9-R10, SC in each st of R7 - 30st
You can fasten off or use a stitch marker.
Change color to contrast color
R11, HDC in each st, use Back Loop only - 30st
Fasten off with invisible join
Change color to Silver. As this is a thinner yarn, I will make 2 rows of Silver in the same stitch of R11. If you use yarn the same thickness as your main color, you can do just 1 row.
R12-R13, SC in each st of R10 - 30st
Fasten off with invisible join

 R14, HDC in each st, use Back Loop only - 30st
R15, *HDCdec, HDC in next 4st - 25st
R16, *HDCdec, HDC in next 3st - 20st
R17, *HDCdec, HDC in next 2st - 15st
R18, CH2 and turn, HDC in the next 14st in Front Loop only, to make collar of dress, CH1, turn, SC in same st, FPSC in each next st back to first st. fasten off, weave in ends
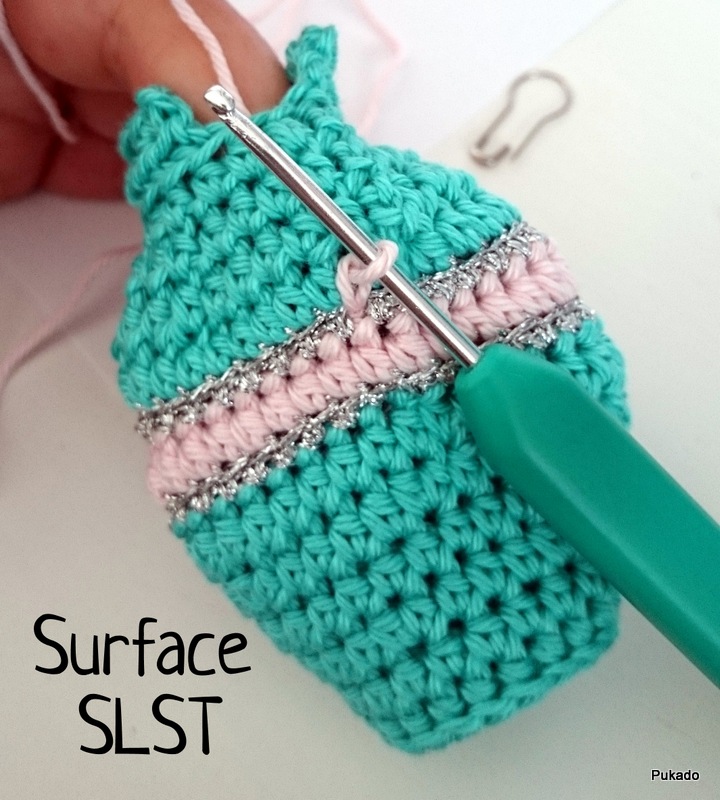
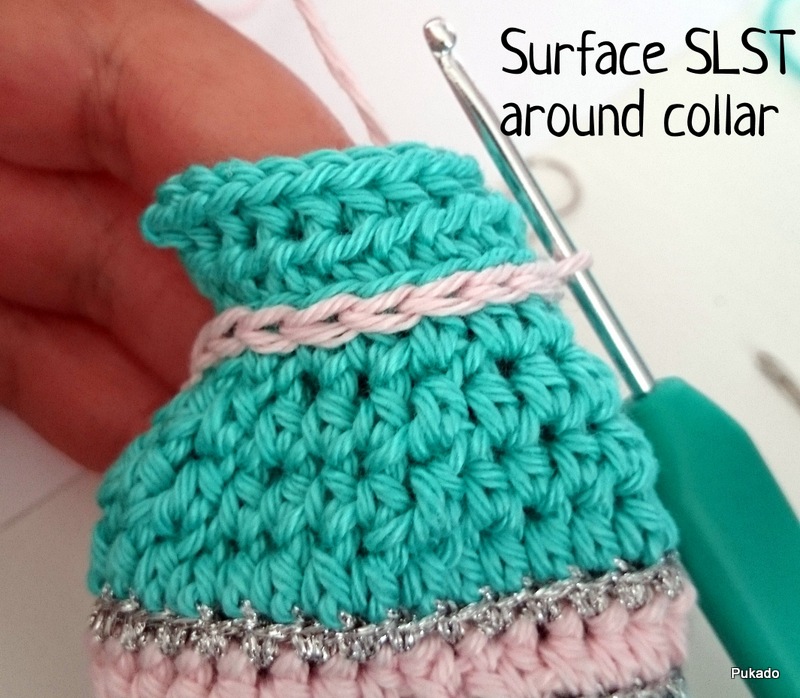
SLST with contrast color V neck on body and around collar.

Sleeves
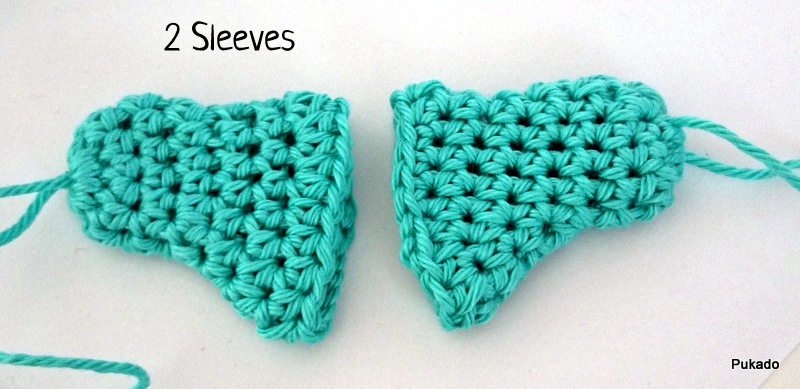
Make 2 in main color
Work in continuous rounds, use stitch marker
Leave long tail for attaching later.
R1, MC, 10SC in MC - 10st
R2, HDC in each st - 10st
R3, 2HDC in next st, HDC in next 4st, 2HDC in next st, HDC in next 4st - 12st
R4, HDC dec, HDC in next 4st, 2HDC in next 2st, HDC in next 4st - 13st
R5, HDC dec, HDC in next 4st, 2HDC in next 2st, HDC in next 3st, HDC dec -13st
R6, HDC dec, HDC in next 4st, 2HDC in next 3st, HDC in next 4st - 15st
R7, HDC in next 7st, 2HDC in next 2st, HDC in next 5st, 2HDC in next - 18st
R8, 2HDC in next, HDC in next 3st, SC in next 3st, SLST in next 2 st, join with invisible join and weave in end - 11st - you will have 20st now in total
Edge around with Silver. SLST to R7 or R8, on the back of the sleeve.
R9, SC in each st of R7 and R8, 2SC on top of the 2HDC of R7 and R8 - 22st
Attach sleeves to body around shoulders with a few stitches. Top 4 rows of sleeve lines up with R15 of body. Space between sleeves on back is 6st.

Back piece
In contrast color
Leave a long tail
 R1, CH18,HDC in third CH from hook, HDC in next 15CH - 16st
R2-R4, HDC in each st - 16st
Add a row of SC on each side of the back piece with main color
Weave in all ends, except tail end. Use tail end to stitch short sides of back piece together.
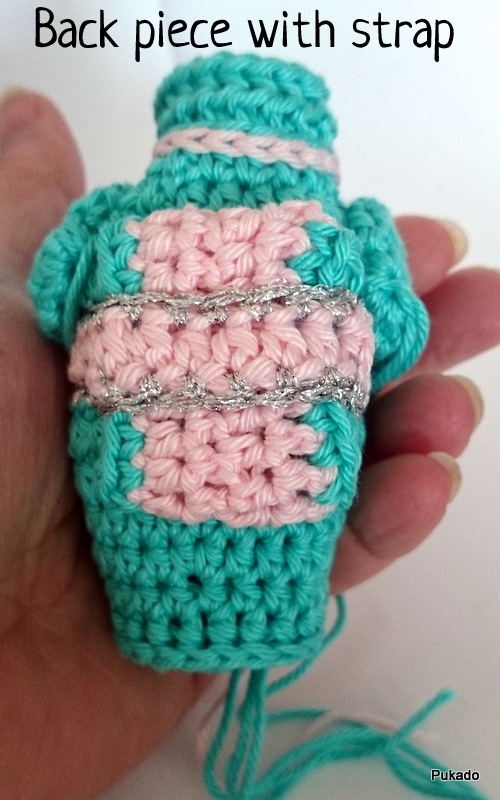
Strap, with contrast color:
R1, Ch16, HDC in third CH from hook, HDC in next 13CH
Edge around with Silver
R2, SC in each st of R1 on both sides Sew strap on back piece with a couple of stitches.
Add back piece to body, strap and stripe lining up, secure with a few stitches.
Stuff body with filling
Hands
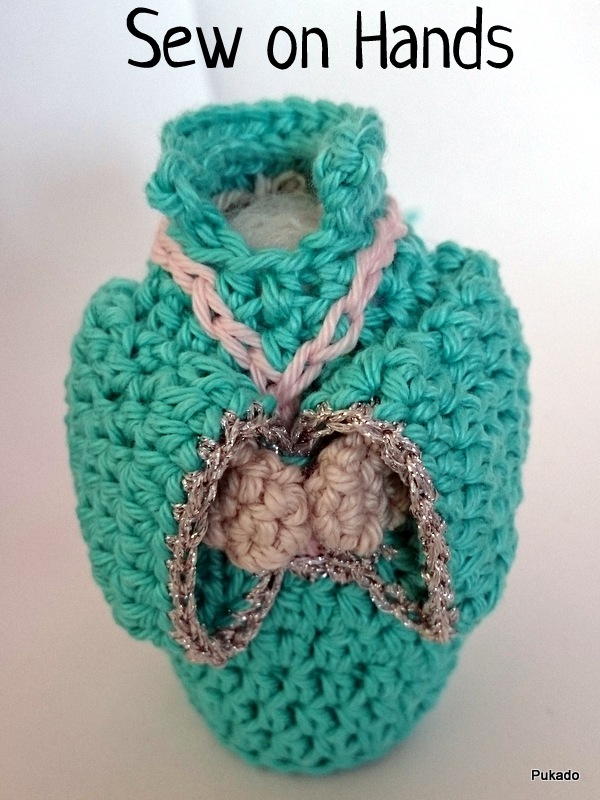
 Make 2, use the Perle
Work in continuous rounds
R1, MC, 4SC in MC - 4st
R2, 2SC, SC, 2SC, SC - 6st
R3-R5, SC in each st - 6st
Do not use filling. Place hand in each sleeve and sew on.
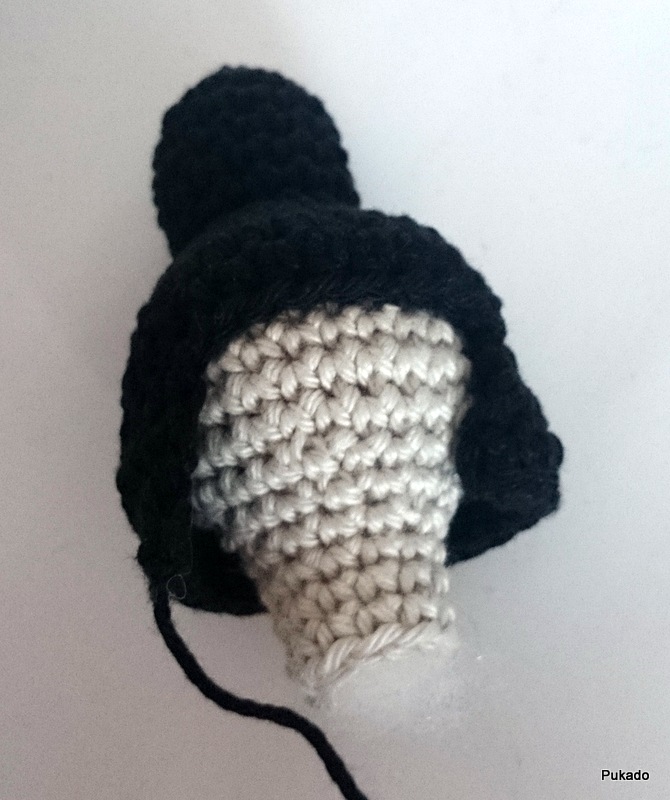
Head
 SLST to first st to join each row, CH1 to begin
R1, MC, 5SC in MC - 5st
R2, 2SC in each st - 10st
R3, *2SC, SC in next st* repeat around - 15st
R4, *2SC, SC in next 2st* repeat around - 20st
R5, *2SC, SC in next 3st* repeat around - 25st
R6, *2SC, SC in next 9st* repeat around, last series has only SC in last 4st - 28st
R7-R8, SC in each st - 28st
R9, *SCdec, SC in next 9st* repeat around, last series has only SC in last 4st - 25st
R10, *SCdec, SC in next 3st* repeat around - 20st
R11, *SCdec, SC in next 2st* repeat around - 15st
R12, *SCdec, SC in next 3st* repeat around - 12st
R13-R15, SC in each st - 12st
Hair
SLST to first st to join each row, CH1 to begin

R2, 2SC in each st - 10st
R3, *2SC, SC in next st* repeat around - 15st
R4-R7, SC in each st - 15st
R8, FPSC in each st - 15st
R9, *2SC, SC in next 2st* repeat around - 20st
R10, *2SC, SC in next 3st* repeat around - 25st
R11, *2SC, SC in next 9st* repeat around, last series has only SC in last 4st - 28st
R12-R13, HDC in each st - 28st
R14, CH2, HDC in same st, HDC in next 19st - 20st
R15, CH2, HDC in same st, HDC in next 18st, 2HDC in last st - 21st
R16, CH2 and turn, HDC in same st, HDC in next 9st, HDC dec, HDC in next 9st - 20st
Fasten off, leave a long tail. Stuff filling in top part of the hair.
Flower
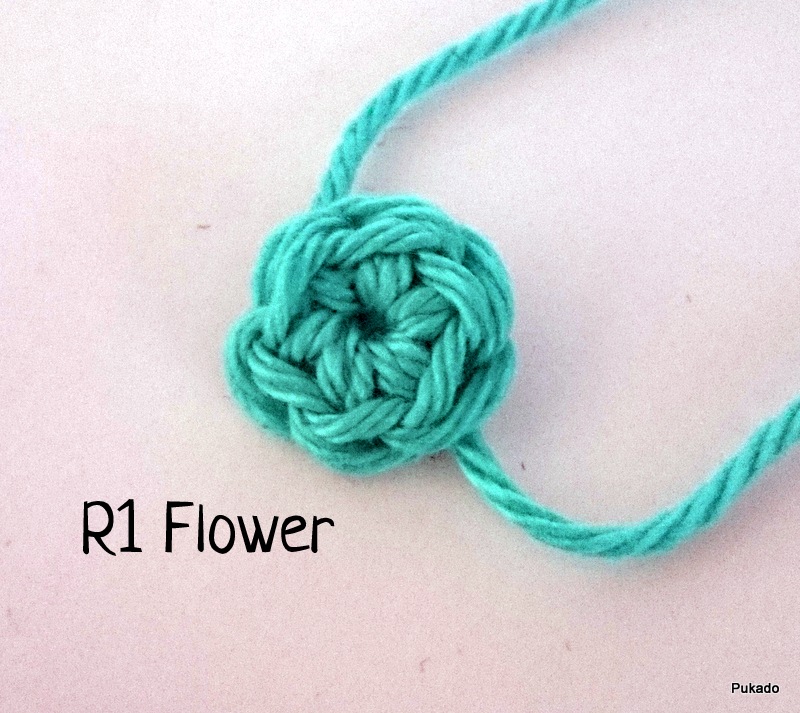 R1, with main color, MC, 5SC, join with invisible join - 6st, leave long tails
 R2, SLST with Silver to st, *CH2, 4DC in same st, CH2, SLST in same st, SLST in next st* repeat for all 6st to create the 6 petals. Leave one long tail to stitch petals to hair
Fasten off, weave in ends.
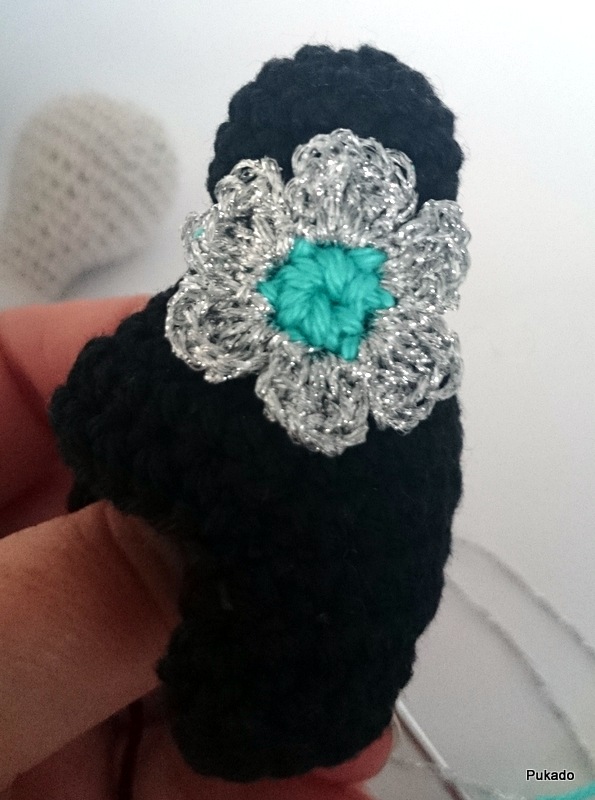
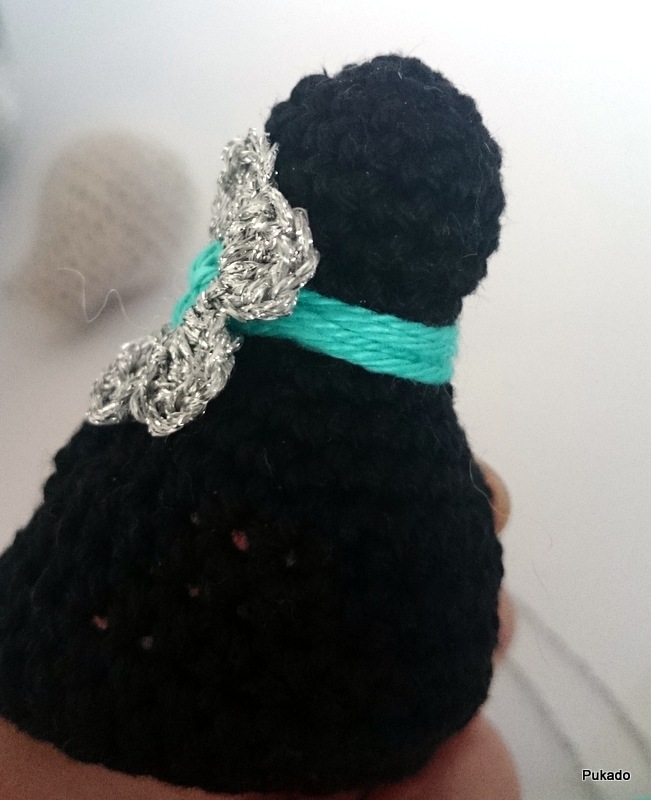
Assembly Head
Place flower on top of seam of the hair, with the main color tails, wrap around the top part of the hair a couple of times. Stitch flower in place.
Stitch with the silver tail and small stitches, the petals in place on the hair.
Place head on body and stitch with main color in place.
Place hair on top of head and stitch secure with a couple of stitches with the tail. Use the tail to stitch the eyes in place. Weave in ends.


Copyright Patricia Stuart 2014 ©.
You are free to create from the pattern and sell the creations.
Please do not copy, rewrite, resell or distribute as your own, this is prohibited.
Please give credit to my shop for the pattern and if you sell finished items online,
Thank you for your understanding.
Please visit my blog: Pukado - Blog
FaceBook me! @Pukado
Follow me on Pinterest
No comments:
Post a Comment